Posting And Printing Job Journal Entries
This section describes the posting options in the Post/Print menu when you are working in a journal. These options let you post entries and print the posting report after posting.
Before you begin, make sure you have made all the necessary journal entries. Also make sure you have tested the posting.
Follow these instructions to post your Job journal entries:
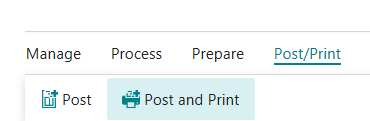
- Click Post to post the entries without printing a posting report.
OR - Click Post and Print to post the entries and print a posting report.
- The program displays a message asking you to verify the posting.
- Click Yes to continue with the posting.
- If the program detects an error, it displays a message.
- If you have problems posting your entries, the program cancels the posting and usually displays a message describing the error.
- Use the Actions ? Posting ? Test Report option to test the posting.
- If the program tells you the date is not in the posting date range, check the dates in the “Allow Posting From” and “Allow Posting To” fields on both the General Ledger Setup and User Setup.
- Also, make sure your accounting periods are set up correctly.
- If the posting is successful, the program removes the posted entries from the job journal batch.
When you have posted your entries, you are ready to print reports.
When posting resources as a “Usage” transaction you can optionally post directly to General Ledger entries. Job Setup contains the option to activate Direct Post to G/L.