New Default Task Message While creating Change Order
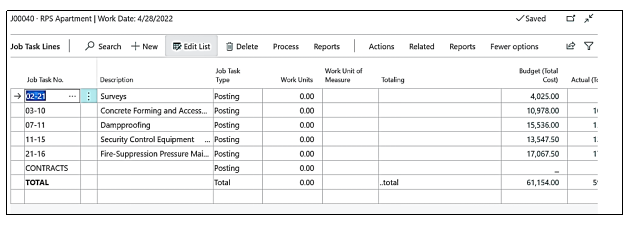
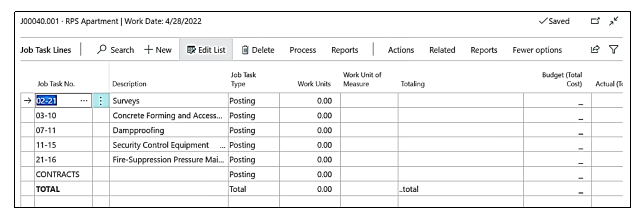
A new default “Task message” has been added while creating the “Change Order” from any “Job”, below is the explanation how this works and below are the “Task Codes” of the “Master Job” for which the “Change Order” need to be created.
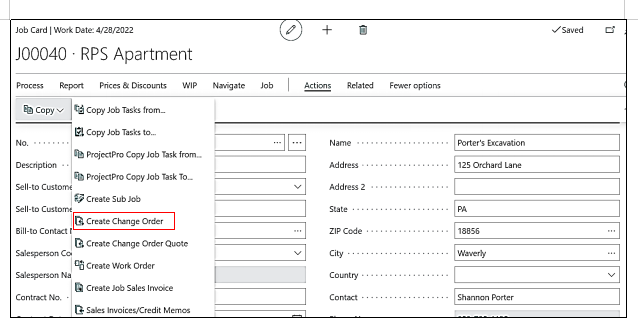
If a user wants to create the “Change Order” from the “Job” then on the “Job card” he has to follow the steps, “Action→Copy→Create Change Order”.
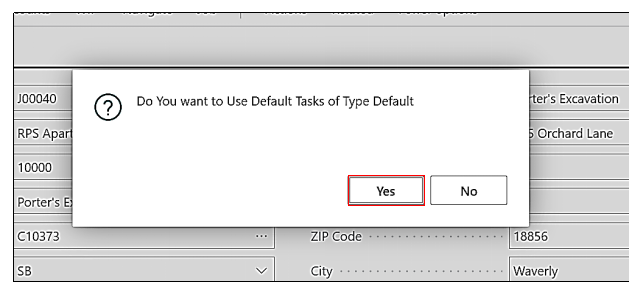
Once the clicks on “Create Change Order” then a default Task message pops up, asking the user “Do You Wants to Use Default Tasks of Type Default” then User must select “Yes” or “No”, if the user selects “Yes”, then the Default tasks which are saved, will be used for the “Change Order”.
If the user selects “No” then there will be a new message Popup asking, “Do you Wish to Use Master Job Tasks?” and if the user selects “Yes” then the “Master Job” tasks will be copied to the “Change Order”
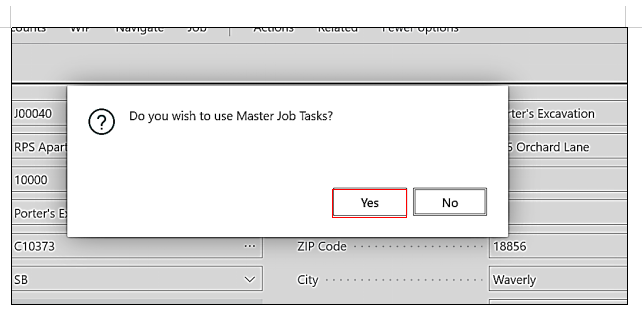
Once the user clicks on “Yes” there will another message popup confirming the creation of the “Change Order”, and when we go to the created “Change Order”, user will find that the “Tasks” of the “Master Job” has been copied to the “Change Order”
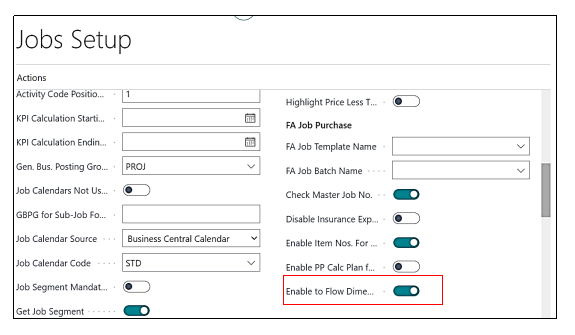
Enable to Flow Dimension Boolean Functionality
“Enable to Flow Dimensions Boolean” is available on the “Job Setup” page when it is True then the “Dimensions” flow correctly to the header but if any line type (Resource or Item) dimensions will get clubbed with the “Job Dimensions” on the line, and for that we will create a “Job” and then we will create a “Subcontract Purchase Order” and check the Clubbed “Dimensions” on the Line of the “Purchase Order” created
Enable to Flow Dimension Boolean on Jobs Setup
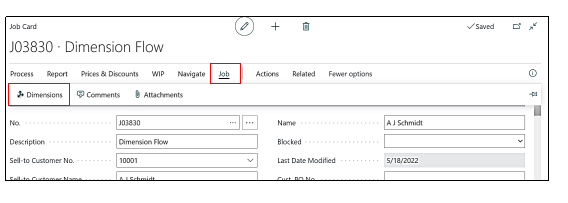
We will choose the Dimensions on the Job Header and for that we will click on Job→Dimensions.
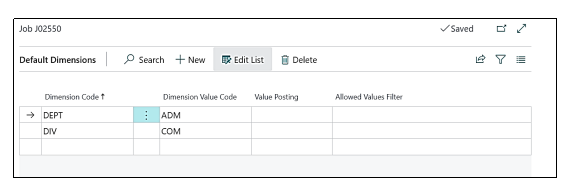
Once we click on Dimensions the Default Dimensions page will open now, we will choose the dimensions as shown in the screenshot below
Now we will go to the Planning Lines where we have an Item and a Resource in the Planning Lines and we will choose the Dimensions in the Resource Card.

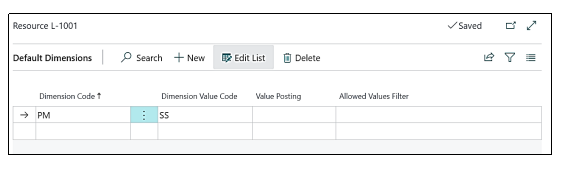
For choosing the Dimension on the Resource Card we will open the Resource Card and go to Resource→Dimensions, Default Dimensions page will open and we will select the Dimension for that Resource as shown in the screen shot below.
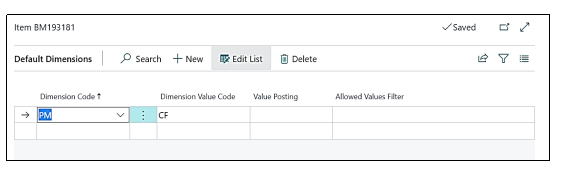
Same process we will follow for the Item and for Item we will choose the dimensions as shown in the screenshot below
Now we will create a Subcontract from this Job and for that we need to go to Process→Subcontract→New.
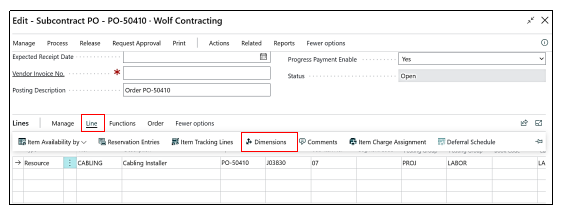
Then we will choose a resource in the subcontract line by clicking on the Get Budget Lines, and create a Subcontract Purchase Order, when we go to the Subcontract Purchase order, we will check the Line Dimensions by clicking on Lines→Dimensions.
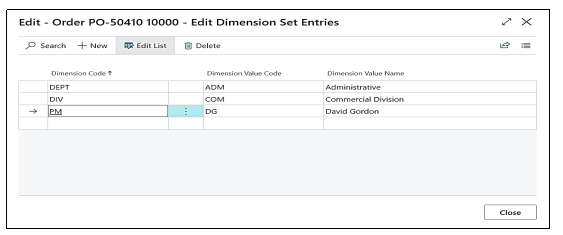
and the Dimensions will get Clubbed as shown in the Screenshot below.
Job Revenue Category Flow from Item Card to Sales Invoice.
A new Enhancement has been done related to the Job Revenue Category on the Item Card, when the “Line Type” is “Both Budget and Billable” – then this “Job Revenue Category” should auto-populate on the respective planning lines. This “Job Revenue category” should automatically flow throughout the process till posted sales invoices are Followed by “Progress Billing”.
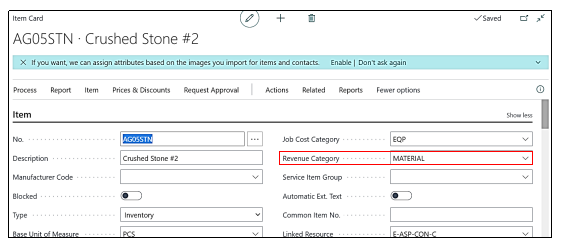
User need to go to the Item Card and define the “Revenue Category” as shown in the screenshot below.
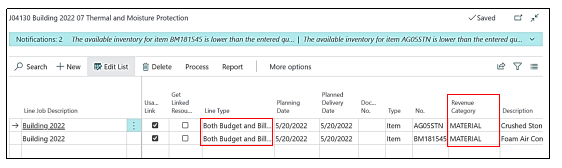
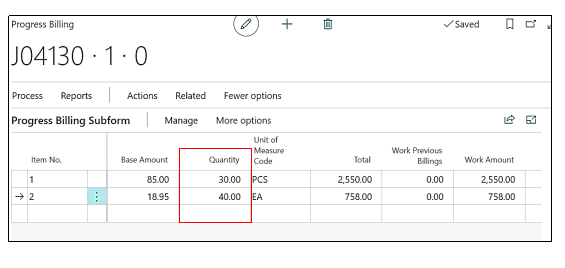
Like wise, we have defined the Job Revenue Category to one more item and pick these both Items in the Job Planning Lines as shown in the screenshot below, but the most important thing is that we have to take the Line Type as “Both Budgeted and Billable” so that we can easily process it to sale invoice through “Progress Billing”
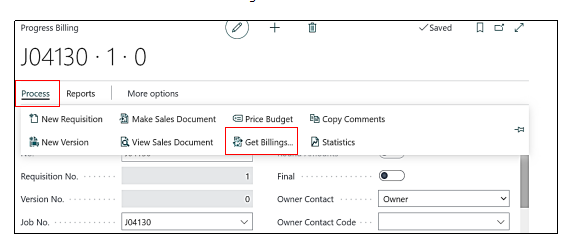
Now we will process the job to Progress Billing by clicking on Process→Progress Billing→ten New,
A Progress Billing page will open.
Now we have to click on Process→Get Billings.
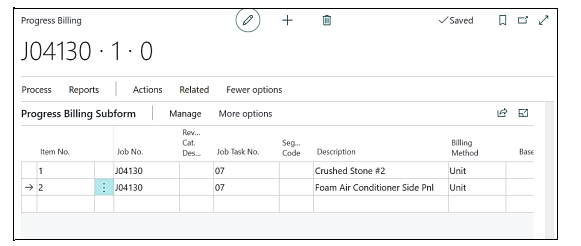
Now the Both Budget & Billable lines will populate in the Progress Billing page Lines.
Here we will mention the “Percentage” to be Billed in the field “Quantity”.
To create the “Sales Invoice” from the “Progress Billing”, User needs to click on Process→Make Sales Document.

Once the user clicks on “Make Sales Document” a pop-up will come asking, “Are you certain you want to make a Sales Receivables Document for this requisition”?, “Yes” or “No”, and the user must click on “Yes”.
Now we will open the Sales Document by clicking on Process→View Sales Document.
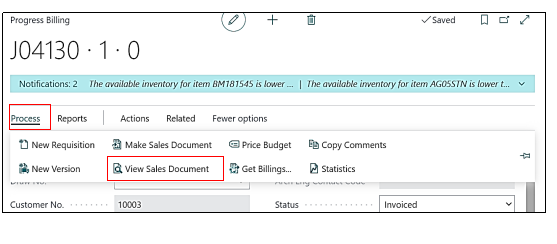
Sales Document will get opened and the “Job Revenue Category” get populated.
