Menu Items
The Jobs menu enables users to create, edit and delete general Job information, posting information and information about the duration of the Job.
From the Job card, you can view statistics, Job ledger entries, contract information, resource and resource group availability and allocations.
Use Default Task Codes while creating Job Card
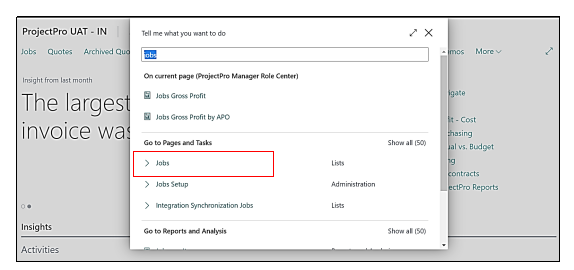
If we want to create the Job card then we needs to click on Jobs on the Role Centre Page.
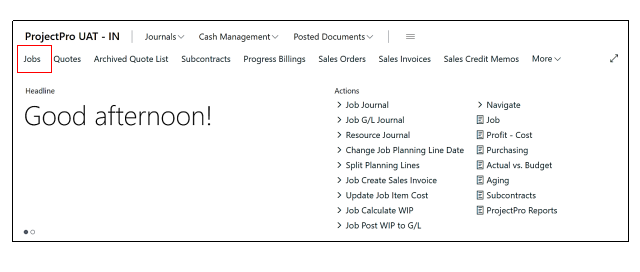
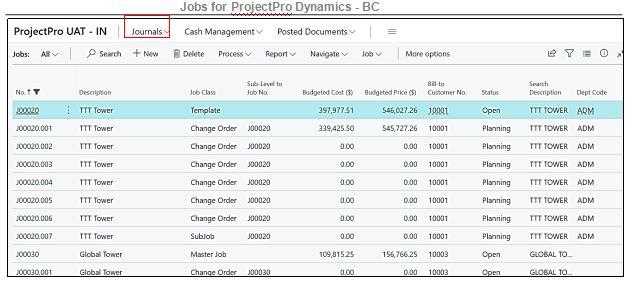
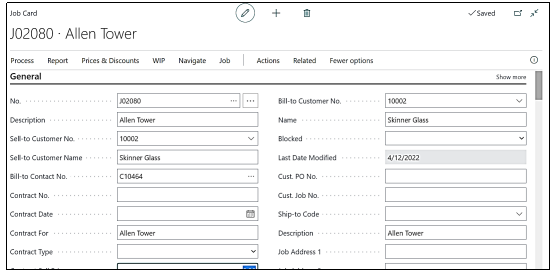
Once we click on Jobs A jobs List page will open which contains all the Jobs created, now we have to click on New option.
When we click on New option, blank Job card will open and we need to fill the required fields and for that we need to press the Tab button, once we press the Tab button a message pop up on the screen asking, “Do You Want to Use Default Tasks of Type Default”
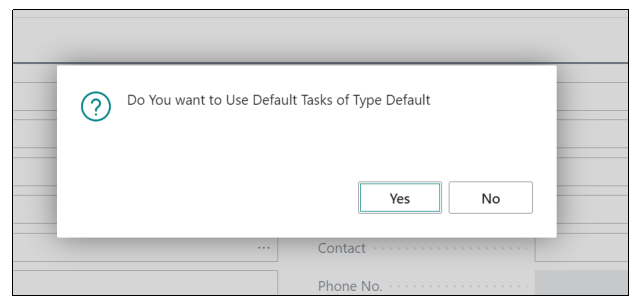
This means that if we want to choose the yes then system will generate the default task Lines which are already saved in the setup and if we click on No then we have to define the Tasks manually, once we click on Yes then the Default task Lines will be created automatically.
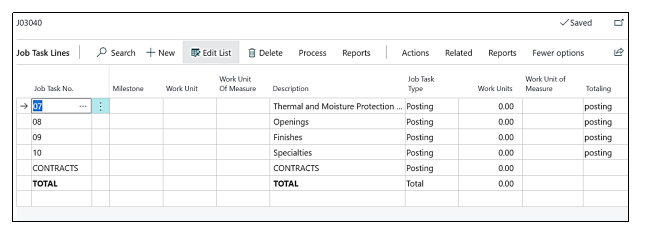
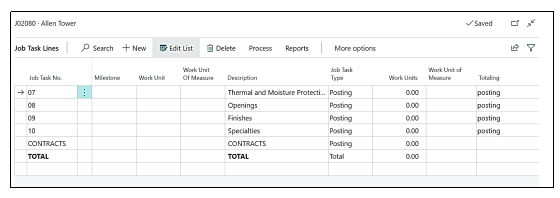
And to check the Default task Lines we need to go to Process→Job Task Lines.
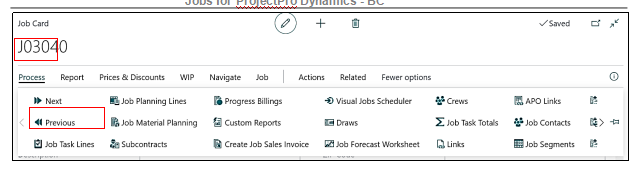
Clicking on “Job Task Lines” page will open having the “Default Tasks”.
This feature enables the user to set up budgets for cost and revenue, plan and track resource usage and cost, various activities, processes, operations, and sections that comprise the Job and the price you charge for the Job. Task lines are mandatory in ProjectPro.
All Inclusive Job Task Lines for Job
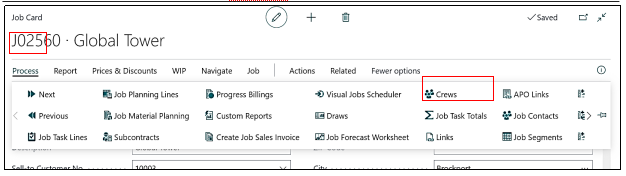
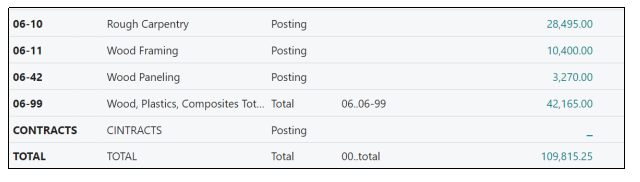
A new tab has been provided for Creating “All-inclusive Task List” on the “Job card under” the “Process tab named : “Job Task Total”, and to go to that Tab we need to open the “Job Card” and then, “Process→Job Task Totals”
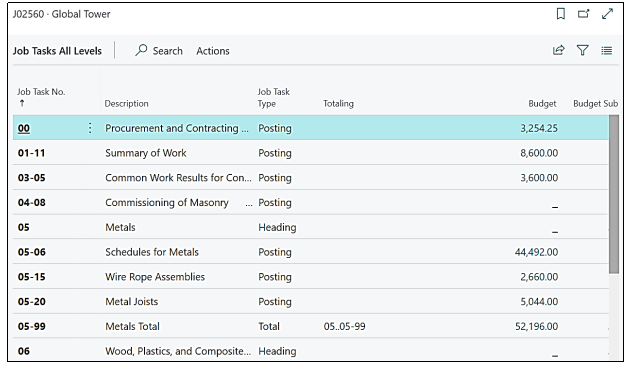
When we Click on “Job Task Totals” “Job Task all Levels” page will open showing the totals of all the inclusive Task totals.
we will see how to copy the “Job Tasks” from one Job to the Another Job by adding the “Task Lines” and “Planning lines” to initial “Job” and how it got copied to another “Job” having the new “Task Lines” and “Planning Lines”.
If a user wants to copy the Job Tasks and the Planning Lines from and to any job then the user must click on a particular Job from which the Job Tasks need to be copied to another Job.
For better illustration, we will create two Jobs
For creating 1st “Job” user needs to click on Jobs on the “Role Centre page” or simply search “Jobs” in the “Global Search Column”, after that user must click on the result.
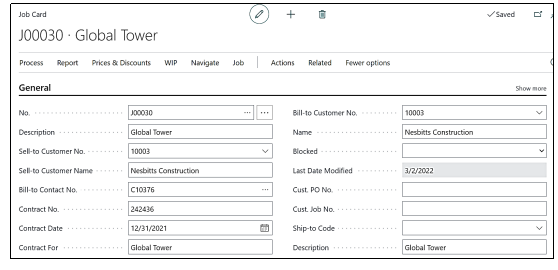
Once the user clicks on the result a “Job List page” will be opened and the user needs to click on the option “New”, by clicking on New a new “Job card” will be opened.
The user must fill all the required fields on the “Job card”.
Now user needs to Go to the “Job Task Lines” and in the default Task Lines, some “Planning Lines” need to be added.
We will add some “Planning Lines” with “Items”, “Resources” and “G/L” in different Task Lines of the Job and for that user must click on “Process→Job Task Lines”.
By following the above process all the Task Lines of that Job will be opened.
Now we will create the “Planning Lines” in the “Task Lines” and for that user must click on any of the “Task Lines” and the follow the “Process→Job Planning Lines”, and add the “Planning Lines” with some Items, resources, and G/L also so that these all will be copied in another Job which we want.
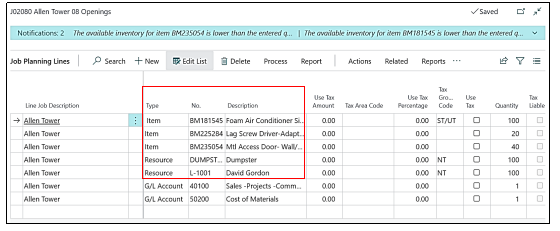
So, for illustration purposes, we will add the Planning Lines in “Task number 08” whose “Description is Opening”.
There is a functionality in in the ProjectPro in which the “Resource” can be linked to the Item, there might be several “Items” for which the “Resource” is also used with them so now we can add the “Resource” with such item so that ifthe user takes those “Items” in the Job “Planning Lines” the “Resource” which is linked to that item will automatically populates with that “Item”.
Linking the “Resource” with the “Item”
To link a resource to the Item user, need to open the item Card which is needed to add in the Planning Lines of that Job and for that user need to open the Planning lines by following the steps, “Process→Job Planning Lines”.
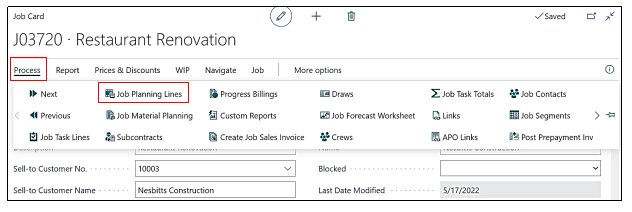
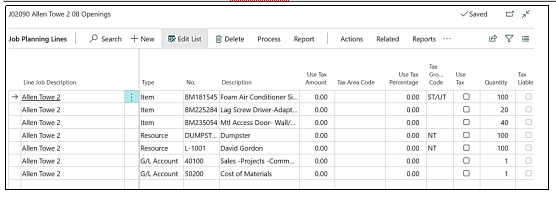
Once the User Clicks on “Job Planning Lines” the “Planning Lines” page will be opened where different “Items” are taken in the “Planning Lines” of that “Job”
As shown in the above screenshot that we have three Items, one Resource & one G/L.
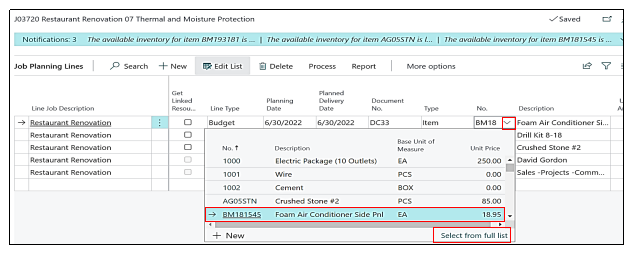
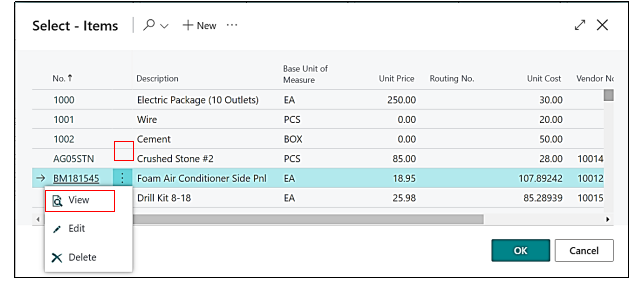
So if the User wants to link the “Resource” with any of the three “Item” he need to open the “Item Card” from the “Planning Lines” and link the resource on the “Item Card”, to go to the “Item card” from the “Planning Lines”, user must click on the Item selected→drill down option needs to be opened→select from the full list.
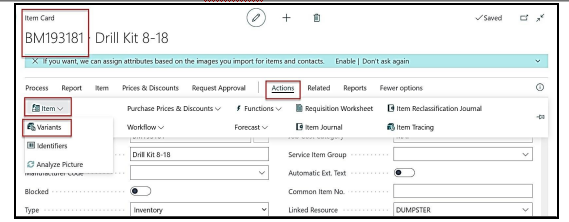
Item Card master will open then user need to click on the three Dots which is displaying on the item, then user must click on the Edit Option.
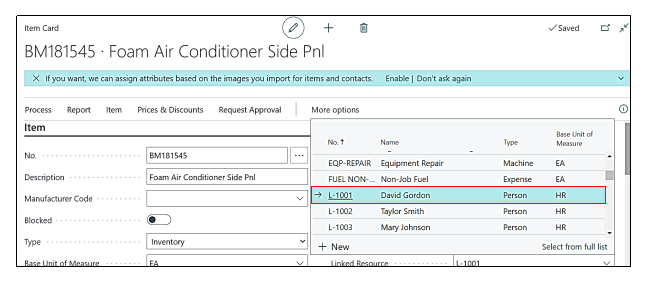
Item card will be opened, then Under the “Item Tab” there is an option of “Linked Resource”, user need to drill down in the “Linked Resource” field, then the Resource List will be opened and to select any Resource we have to click on that resource and then in the Field of Linked Resource that Resource will get added.
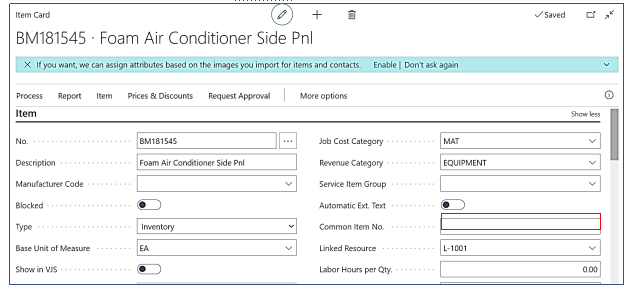
Linked Resource will get generated in the Linked Resource Field.
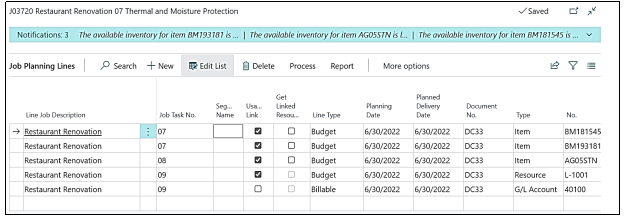
Now user need to go back to the “Planning Lines” and click on the “Linked Resources” Check “Box field” to populate the “Linked Resources”

As the user clicks on the Check Box of “Get Linked Resource” the resource Line will get populated which was Linked on the “Item Card”, as shown in the screen shot above.
Now we will add another new “Task Line” so that the same will be copied to the “New Job” having the default blank “Task Lines”.
And for that user must click on the “New” option on the “Job Task Lines” page and create another “New Task Line”.
Users can create the “Planning Lines” in the new “Task Line” created or can leave it blank also, the same will be copied to the new “Job”.
Creating another Job for Copy to purpose
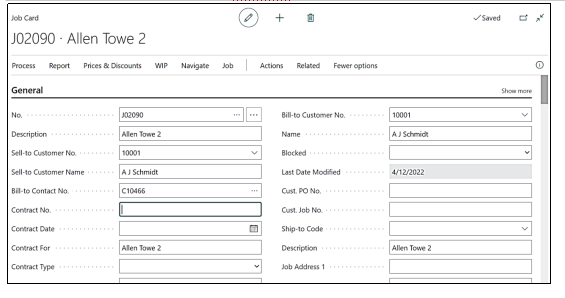
Once the “Task Lines” and the “Planning Lines” have been created, the user needs to create another “job” with the default “Task Lines” with or without the “Planning Lines”,
So, we had created the new “Job” With the default Task Lines which is “J02090”.
Process of copying the Task Lines to a Job
Now the Process of copying the “Task Lines” with the “Planning Lines” is as follows.
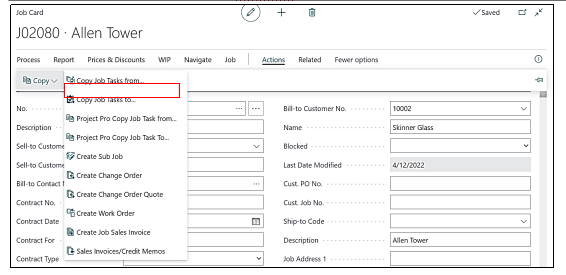
User needs to Go to the “Job” Which he had created earlier with some “Planning Lines” and a New “Task Line”. And follow the “Action→Copy→ProjectPro Copy Job task from”.
Difference between “ProjectPro Copy Job Task Lines From” & “ProjectPro Copy Job Task Lines To”.
We had followed the Process above because we are copying the “Job Tasks” from that “Job”, if the user wants to copy the “Task Line” to this “Jo”b, then the user needs to follow the “Action→Copy→ProjectPro copy Job task To option”.
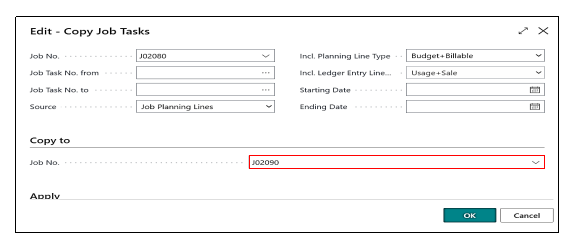
Once the user follows the steps then a page will be opened in which the user needs to fill in the details of that Job to which the user wants to copy the “Task Lines” i.e., “Job Number – J02090”.
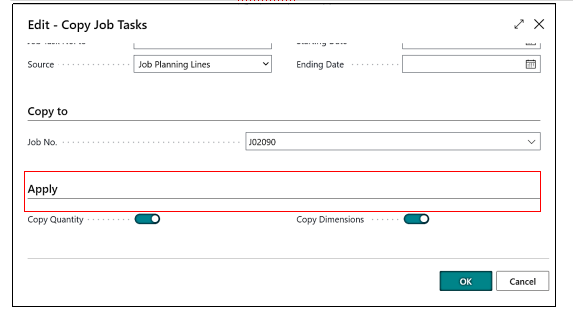
Once the user fills the job Number to which Task Lines need to be copied user must make the Boolean Field as true which are- Copy Quantity & Copy Dimensions, by doing so the task lines which we are copying have some planning Lines with some Quantity of Items, resources, and G/L and by making the Boolean True those Planning Lines with the Quantities will also get copied, the user needs to click on OK
Check for the Copied Job task Lines to another Job
Once the user clicks on Ok there will be a message popup that tells that the “Job Was Successfully Copied”.
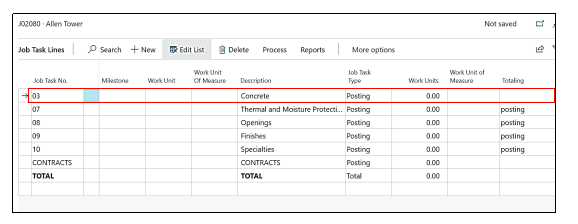
Now we must cross-check whether in “Job J02090”, the additional “Task Lines & Planning Lines” which we had added in Job have been copied or not, and for that, we will go to the “Job – J02090” and check the “Planning Lines” and “Task Lines”.
When we check the “Task Lines”, we see that the Additional “Task Line” which is “03-Concrete” has been copied successfully.
Now we will check the “Planning Lines” of this “Job”, earlier there were no “Planning Lines” in this “Job” and when we open the “Planning Lines”, we notice that the “Planning Lines” which we had created in “Job – J02080” has been copied in this “Job”.
This feature enables the user to define Resources, Items, and General ledgers involved and linked to the various tasks defined within the job. Many users associate this with their job budget (Budget lines) and Schedule of Values (Billable) lines.
The Job Planning lines also offer summarized information related to quantity of each line that has been transferred to an invoice, is available to invoice, has been invoiced to the customer and what has been transferred to job journals.
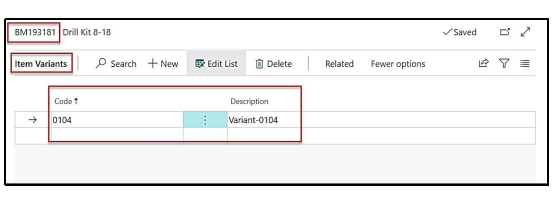
In an item card if a variant is attached. In our example item “Drill Kit 8-18” variant is attached.
A variant “Variant- 0104” is attached with code “0104” for item “Drill Kit 8-18”
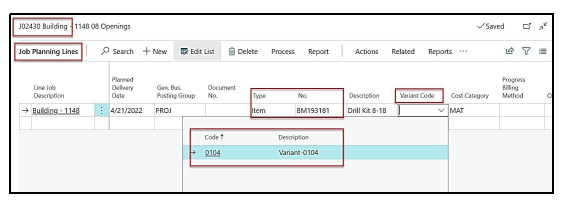
In the Job planning line when we insert the item in the planning line we have the option of attaching the Variant code along with the item.
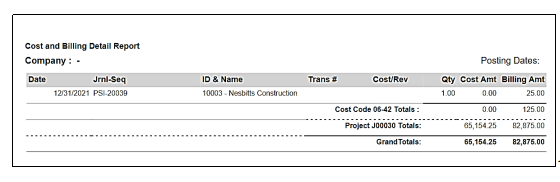
“Cost & Billing Report Detailed” on the Job Card
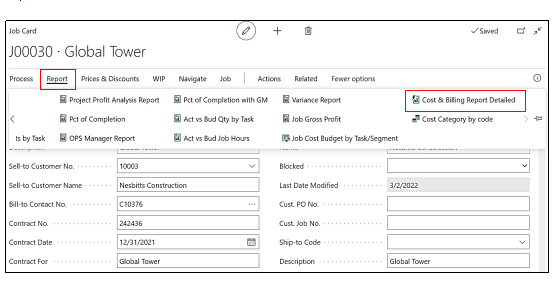
A new report is added to the Job card under the report section and the name of that report is “Cost & Billing Report Detailed”, if the user wants to open this report, then he must follow the Steps:
1 – The user must click on the Jobs on the Role Centre Page, or he can also search the same in the Global Search option and click on the result.
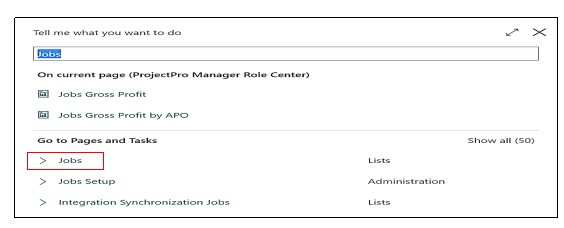
Once the user clicks on the Result then a “Job List” page will be open, to open the report user must open any of the Jobs which have “Costs” and “Billings” inside the “Planning Lines” so that the report will show the detailed information.
If the user wants to open the “Cost & Billing Report Detailed”, then the user must click on “Reports→Cost & Billing Report Detailed”.
Once the user clicks on the “Cost & Billing Report Detailed” under the Reports section then a report will be opened showing the “Task Wise Cost and Billing Details” as shown in the below screenshot.
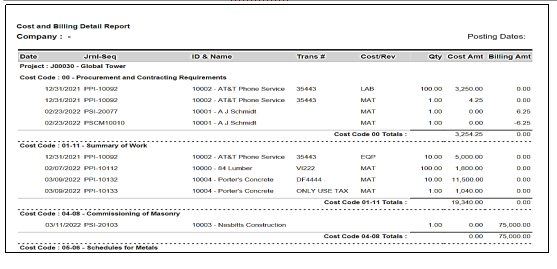
At the End of this report there are totals of all the Costs & Billings also.