Ch 01 – Progress Billing Process
Contents
| INTRODUCTION |
| PROGRESS BILLING |
| Get Billings Function |
| New Version Function |
| Make Sales Document Function |
| New Requisition Function – Creating A Subsequent Requisition |
| 100% Billing |
| Final Retention Billing |
INTRODUCTION
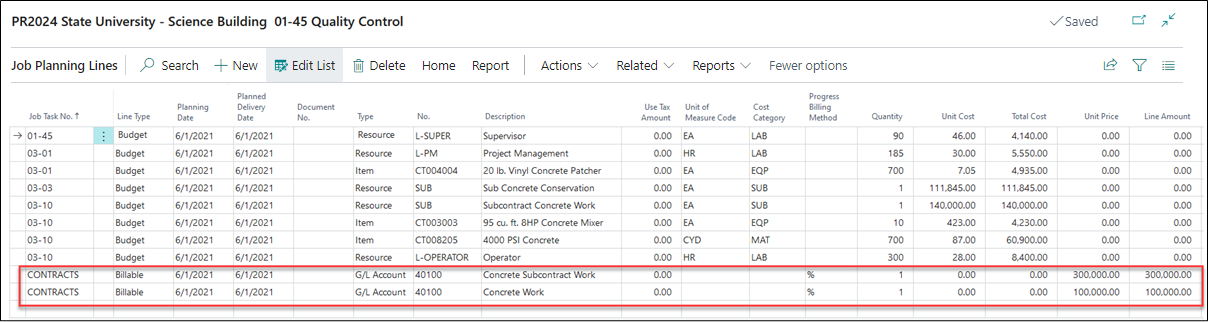
A progress billing is an invoice that is intended to obtain payment from a customer for that portion of a project that has been completed to date. These billings are commonly issued when a project has a long duration, so that the contractor can obtain sufficient funding to support its operations. Before starting a progress billing, user must check that the Project has been set up with the appropriate Planning Lines.
To create a progress billing, you must have a project with “Billable” or “Both Budget and Billable” planning lines. You must also indicate the Progress Billing Method as Unit Billing, Percentage Billing, and Lump Sum Billing (Unit, %, and L/S).
Note: If you are using either Percentage or Lump Sum Billing methods the quantity is always “1”. Variable quantities can only be used when you are using Unit Billing Methods.

You can also define the Revenue Category for the planning lines, if required.
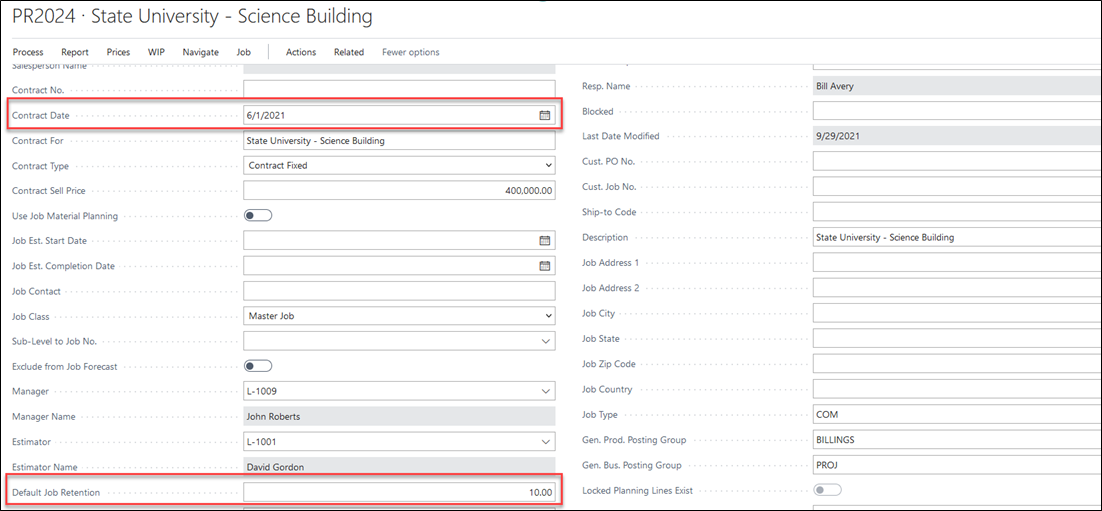
If retention is applicable to your Project, enter it on the project card in the “Default Project Retention” field. Make sure you have entered the “Contract Date” for this project as well, see below screenshot.
Note: The Contract Date is mandatory and used to indicate whether this Project card and billing items represent a current month change order or a previous month’s billing item on the AIA G702. The Contract Date should always be prior to your first Progress Billings Requisition Date.
Create a progress billing by clicking on Process → Progress Billings.

For first requisition, click on “New” from the Project Progress Billing List page.
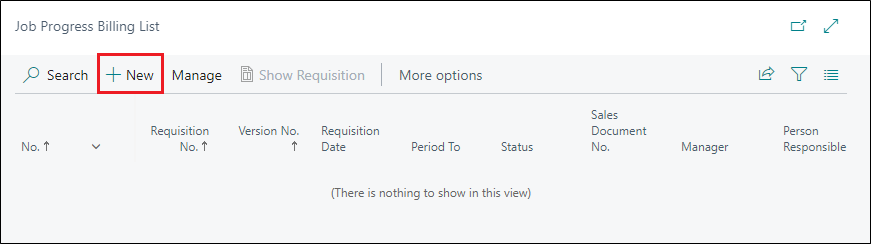
Depending on your Projects Setup, you may find that once created, ProjectPro will automatically assign a No. to your Progress Bill. In most cases this No. will match your Project No. However, depending on your setup, you may be required to enter a No. in this field.
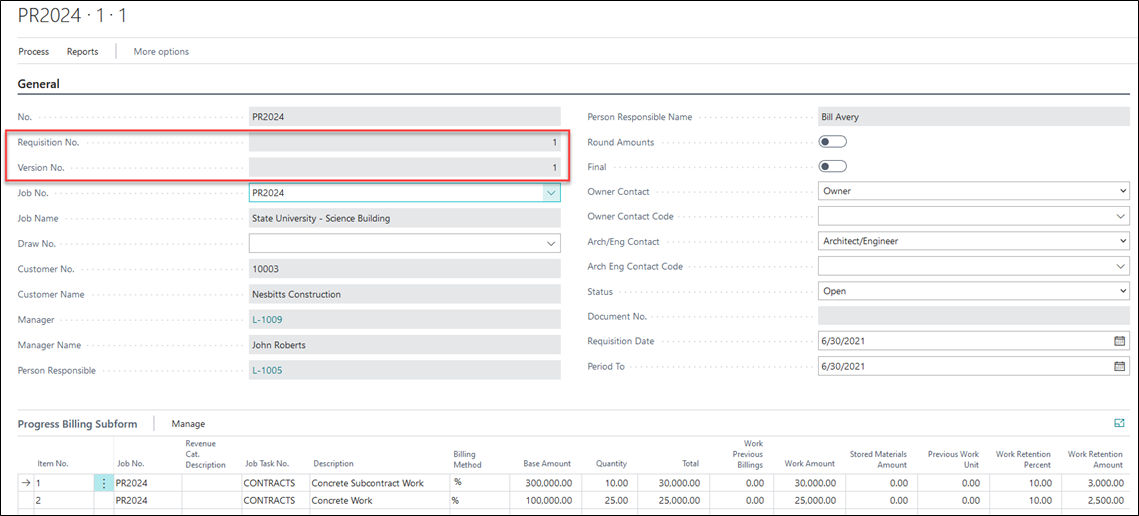
In this example, the No. has been filled in to match the Project No. You will also see that Requisition No. has automatically been filled in as “1” since this is first billing.

General Fast Tab
To complete the General tab of the Progress Billings you will need to fill in each of the fields detailed below.
| FIELDS | DESCRIPTION |
| No. | Enter a progress billing number or enter the Project number as a reference.
To auto-populate the Progress Billing no. as the Project No., turn ON the option “First No. for project to default as Project No.” on the Progress Billing fast tab of the Projects Setup. |
| Requisition No. | The requisition number automatically becomes ‘1’ for the first requisition billing and will increase by one with each new requisition. |
| Version No. | The version number starts as ‘0’ for the first version. The purpose of the version number is to track changes that have been made because of the project owner, architect, or engineers’ requirements prior to acceptance. |
| Project No. | The Project No. will automatically fill in from the Project Card. |
| Project Name | The Project Name will automatically fill in from the Project Card from the “Description” field. |
| Draw No. | The “Pay when Paid” number that gets assigned to the Customer Sales Invoice and Vendor Purchase Invoice. If you are not using Draw No., you can leave this field blank. |
| Customer No. | The Customer No. will automatically fill in from the Project Card. |
| Customer Name | The Customer Name. will automatically fill in from the Project Card. |
| Manager | The Manager ID No. will automatically fill in from the Project Card. |
| Manager Name | The Manager Name will automatically fill in from the Project Card. |
| Person Responsible | The Person Responsible ID No. will automatically fill in from the Project Card. |
| Person Responsible Name | The Person Responsible Name will automatically fill in from the Project Card. |
| Round Amounts | Toggling this ON will result in billing values being rounded to the neared whole dollar. |
| Final | This can be used to indicate that the requisition has been accepted by the Project owner or representative. Once a progress billing is set as Final, you cannot create anymore Revisions of that requisition. |
| Multiple Retention % on Lines | If this is True then, it will allow you to put in different Retention % or values at the Progress Billing Line level. |
| Owner Contact | If you have indicated an Owner Contact for Billings, their name will appear here. |
| Owner Contact Code | Owner Contact ID will automatically fill in. |
| Arch/Eng. Contact | If you have indicated an Architect or Engineering Contact, their name will appear here. |
| Arch/Eng. Contact Code | Architect or Engineer Contact ID will automatically fill in. |
| Status | Each requisition has a status which indicates whether the billing is ‘Open, Invoiced, Accepted, Paid, or Void.’
Status is automatically updated to invoiced when sales invoice is created or if a new version is created it automatically voids. |
| Document No. | Once the progress billing is invoiced through a Sales invoice, the document number will indicate the Sales Invoice or Sales Order No. created. |
| Posted Sales Invoice No. | Specifies the posted document no. of the invoice posted against the requisition. |
| Requisition Date | This field is for the date this requisition is being prepared. |
| Period To | This field is for the date in which is to indicate the work through period. Such as, work performed through the period ending 6/30/21. |
| Retention Reduction and Invoicing | Enable this Boolean if the Retention% is reduced and further billing is to be done on same requisition. |
| Invoiced Currency Code | This field presents the FCY Currency Code from the Project card’s “Invoiced Currency Code”. This will create your sales invoice in FCY. |
Get Billings Function
Once you have filled in the necessary fields above, the next step is to pull in your billing lines from the Project Planning Lines via “Get Billings” function.

The “Get Contract for Progress Bill” window will pop up, as below where the project no. gets pre-populated, and you just need to click on OK to bring in the billing lines.

This will update the progress billing sub form with the billable (including Both Budget and Billable) planning lines available for a project.
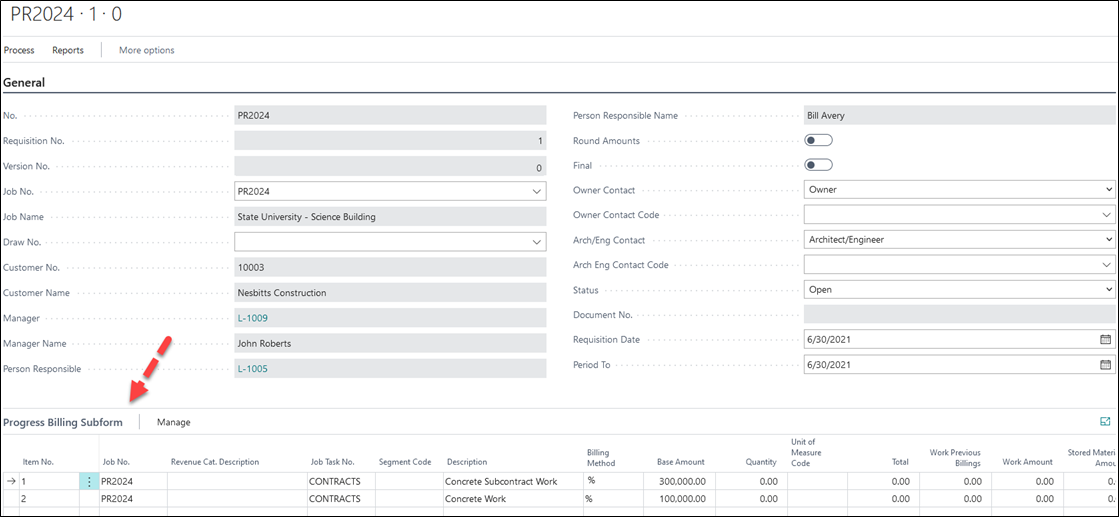
Here, you can enter the percentage of each line you would like to bill for this requisition under “Quantity” column which will auto calculate billable amount under “Work amount” column.
Since this is the first requisition, there will be no value in “Work Previous Billing” column.

Note: If you are billing in units, you will enter the number of units to be billed in the Quantity column.
If you have identified a retention percentage for your project on the Project card, you will see that each line automatically reflects the percentage that has been entered and the appropriate retention has been calculated.

Alternatively, if you did not enter retention on the Project Card, you can enter the percentage in the “Retention” fast tab located below the Progress Billing Sub form, or you can enter the percentage for each line individually, if it varies.
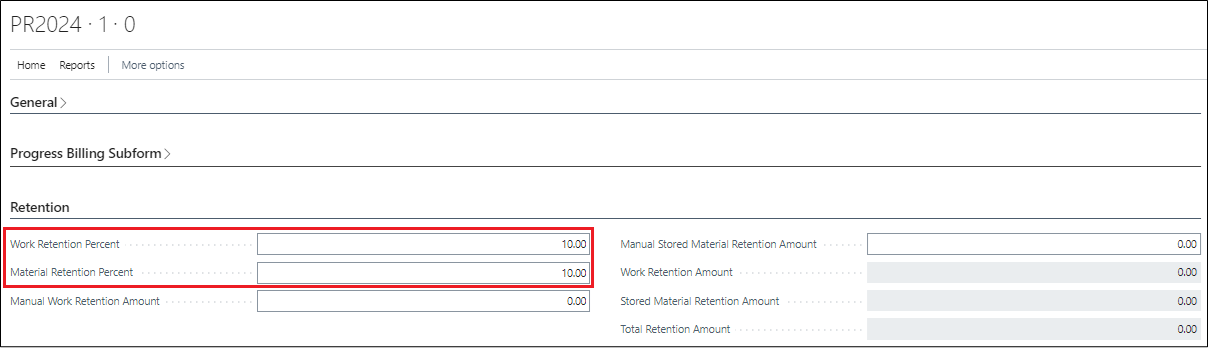
Retention Fast Tab
The fields under this fast tab are used for entering the percentage of retention for both “Work Retention” and “Stored Materials Retention”. If the Default Retention % is defined on the Project card, then these fields will get updated automatically.
If you wish to apply retention percentages for each line item individually, then leave the Retention Fast Tab fields blank and apply percentages on each billing line item.
Note: The individual retention percentage does not apply if you are using “Taxable” progress billings. In that case, only one retention percentage can be applied.
If you are satisfied with your progress billing at this point, you can create your Sales Invoice (We will explain this process below).
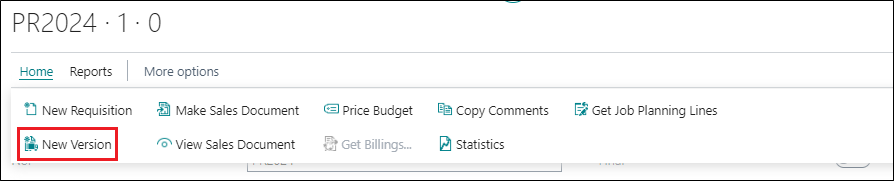
New Version Function
Many a time, companies create their progress billings and submit them to the owner or general contractor for review before invoicing. This is commonly known as “pencil copies”. If your company is also following this method and you receive requests for changes before you can submit your final invoice, then you perform this in progress billings via “New Version” function for that requisition.
From the Progress Billing Ribbon, click on Process → New Version.
The purpose of creating a new version is to maintain an audit trail of the changes you have made to progress billing.
Once you select “New Version” you will receive a message stating “a new version has been created. The status of your original version has also been marked Void”.
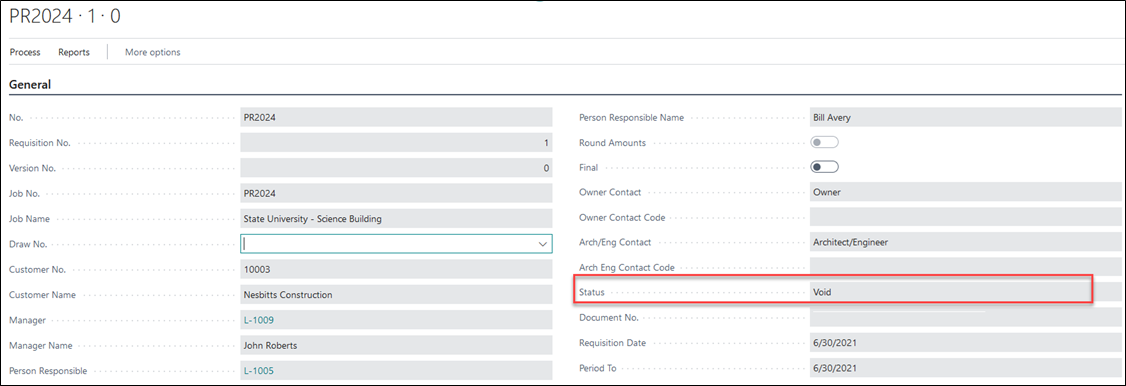
Now you will see you are working on Requisition 1, Version 1.
Initially the Progress Billing Subform remains unchanged. The billing percentages entered on Version 0 get carried over where you can make any necessary adjustments that are required. As an example, Line 1 billing has been reduced from 10% to 5% and Line 2 remains unchanged.

Once the required fields on Progress Billing have been entered, you can proceed to create a sales document.
Make Sales Document Function
For creating Sales Invoice, Click on Process → “Make Sales Document”.

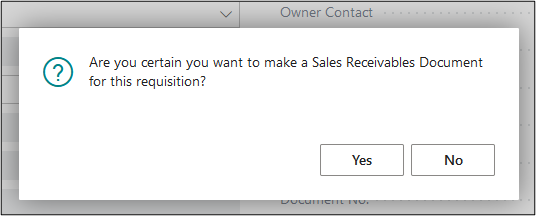
Select “Yes” when prompted for confirmation of document creation.
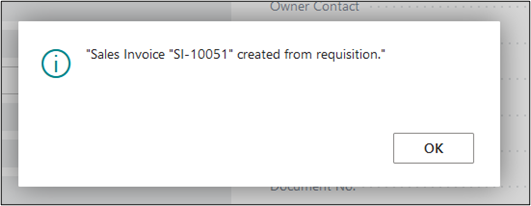
You will receive confirmation of the Sales documentation being created, and the assigned sales invoice number.
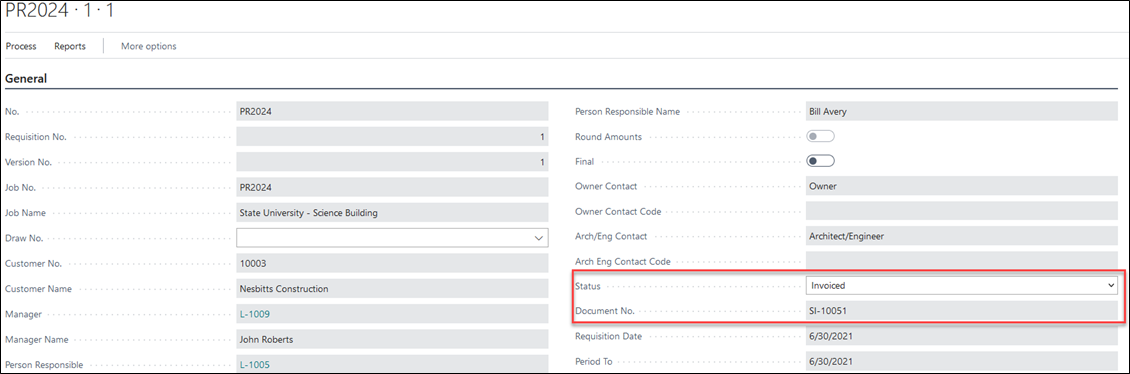
The Status of this progress billing will now get changed to “Invoiced” and you will notice the Sales Invoice number that was assigned above has now been filled in as Document No.
Depending upon your internal process, you can continue to post your Sales Invoice from the progress bill, or you can visit the Sales Invoice page and post from there.
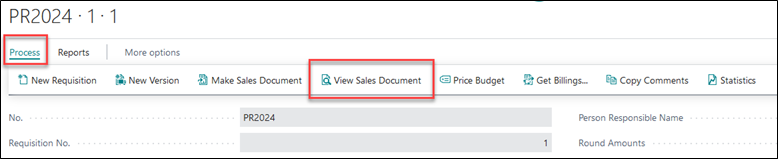
To post from the Progress Billings page, click on Process → “View Sales Document”.
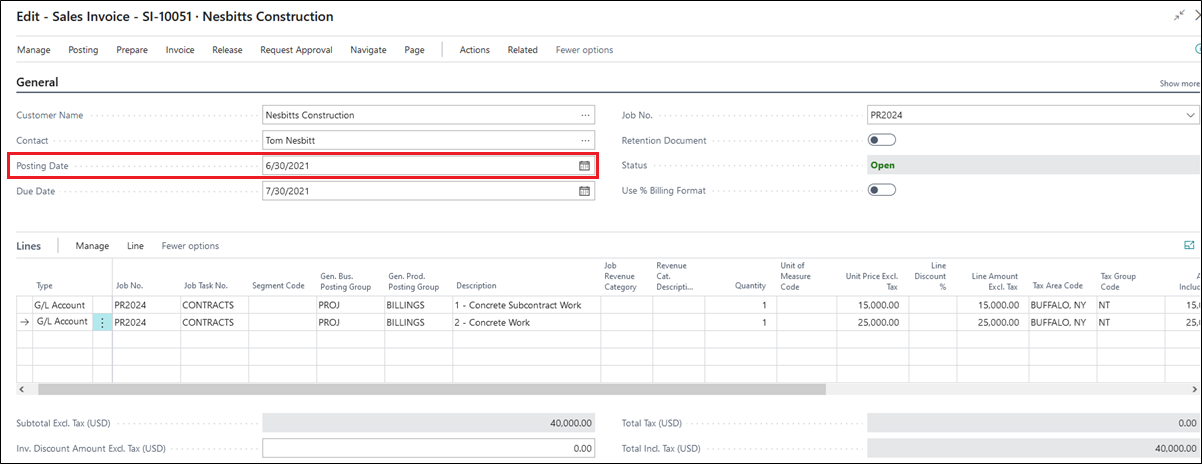
You will be taken to the Sales Invoice.
Note: Before posting the sales invoice, verify if the correct information has been updated from the requisition.
On the General fast tab, you will see Posting Date has automatically been marked with the “Requisition Date”. This can be modified if you do not want to keep the posting date same as requisition date.
On the Lines fast tab, you will see each of your billable lines from the Progress Billing Subform and the corresponding total for each.
On the Retention fast tab, you will see 10% has been calculated and the retention due date is automatically filled in according to Projects Setup for retention.

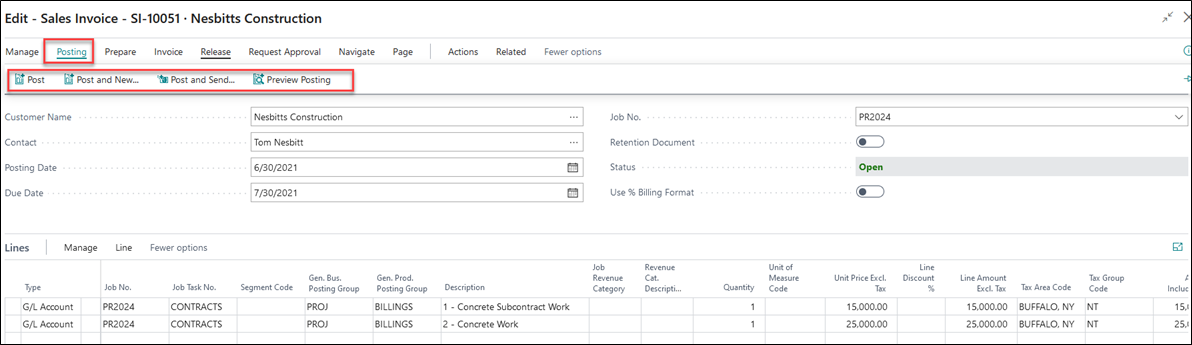
Post the invoice using the appropriate option under the Posting section of the ribbon.
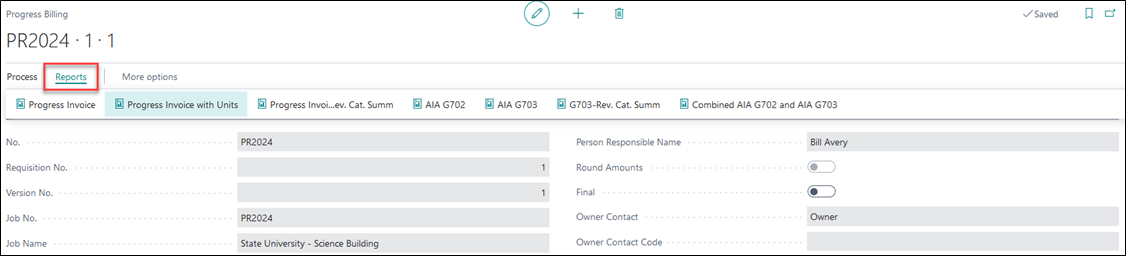
Once the sales invoice is posted, you can go back to the progress billing requisition and run different reports and AIA documents.
Note: To use AIA documents, you need to fill in your AIA Form Code and Expiration date on the Projects Setup page.
Two of the sample reports are shown as below:
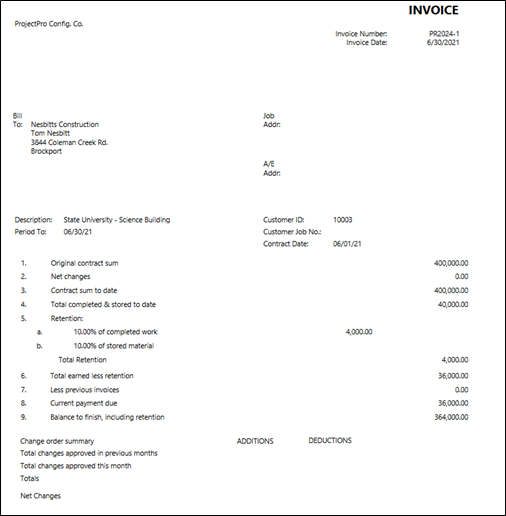
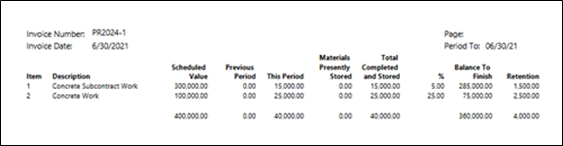
1. Progress Invoice Report
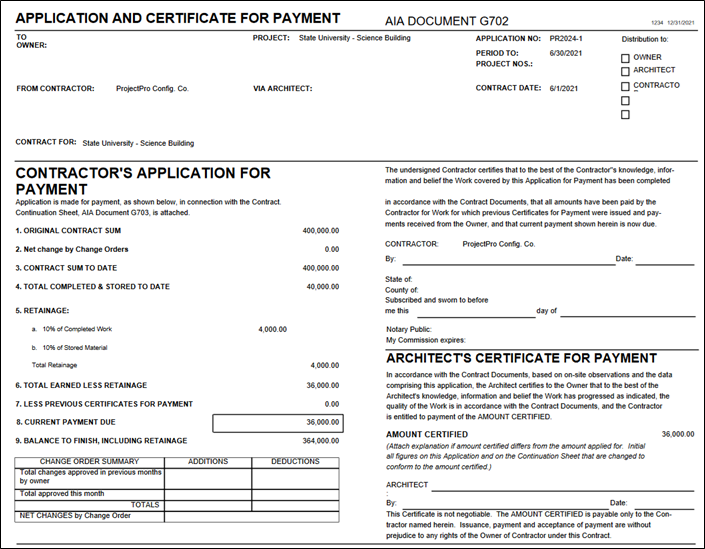
2. AIA G702 Report
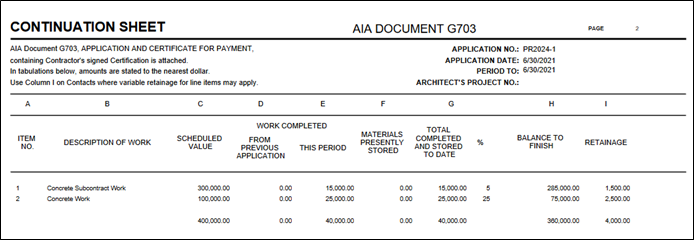
3. AIA G703 Report
New Requisition Function– Creating A Subsequent Requisition
The next requisition can be created from the last requisition that you have created. The Progress Billings List page shows all the prior requisitions, including any voided versions.
Open your last invoiced requisition from the list. Here, the last requisition is Requisition 1, Version 1.

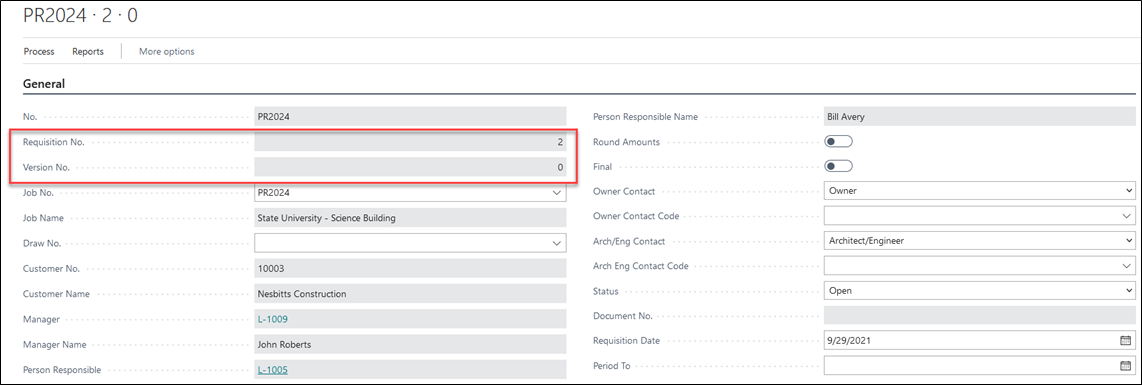
From the Progress Billing ribbon click on Process → New Requisition.

The “Requisition No.” will get increased to 2 where Version No. is 0. You are now working on Requisition 2.0
Enter the new Requisition and Period to Dates. Notice your Progress Billing Subform reflects your invoiced amounts from Requisition 1 in the “Work Previous Billings” column.

Enter the percentages that you would like to bill for this Requisition in the Quantity column. The “Total” column will now reflect the total amount to be billed to date on this project (Work Previous Billings + Work Amount = Total).
From here you will follow the same process as above to create and post your Sales Invoice.
100% Billing
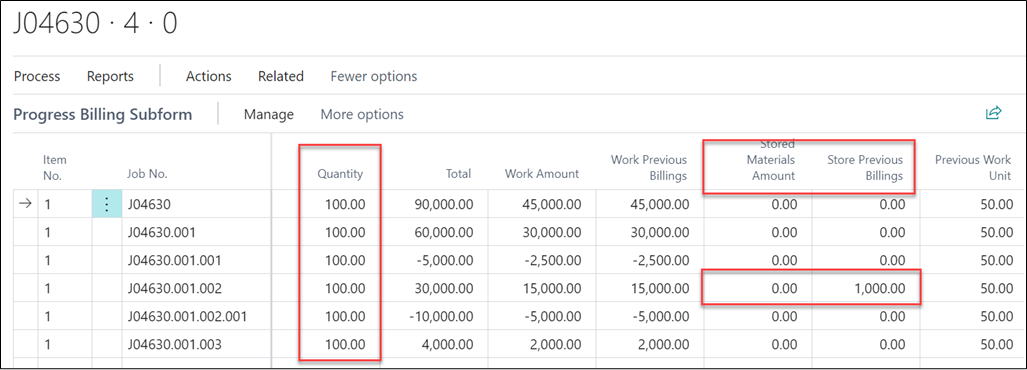
On completion of the contract including utilization of Store Materials (if any, the complete concept explained in next chapter), you need to bill 100% on all the lines.
On the last requisition, enter 100 in the Quantity column to bill the full value excluding the retention. Also, if stored materials are included then you need to change the “Stored Materials Amount” to 0 since the complete utilization has been done, see example below.
Once the details are entered, the sales invoice can be generated and posted.
Final Retention Billing
Once the whole project is approved the remaining Retention% on all the lines can be billed to the customer.
From the last requisition where everything is billed to complete 100%, create a New Requisition. Remove the value from “Work Retention Percent” field on the Retention fast tab or if multiple retention is used then remove the same from for all the lines and then create a sales invoice.
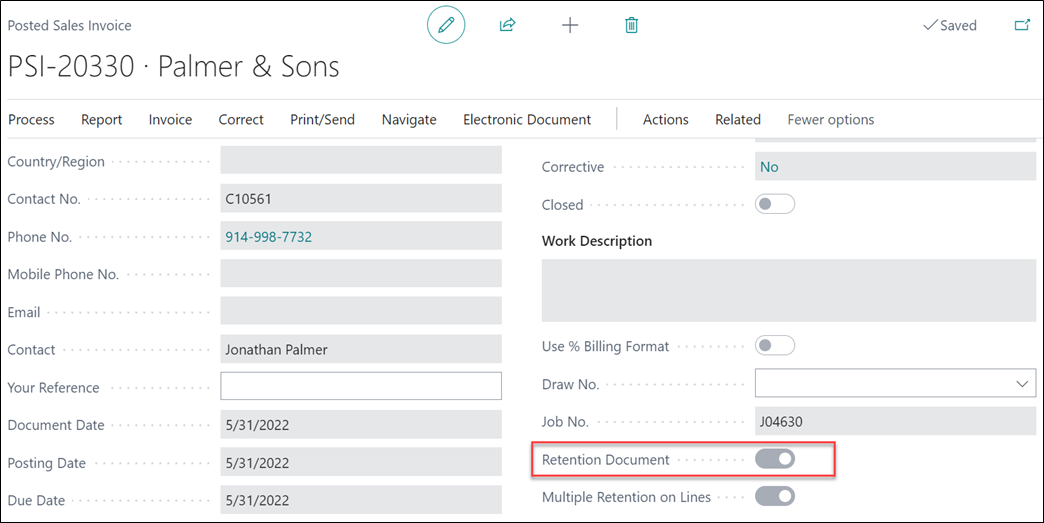
The system creates a sales invoice marked as “Retention Document”.