Ch 18 – Interim JLE Purchases
Contents
| INTRODUCTION |
| PURCHASES & PAYABLE SETUP |
| PROCESS |
| 1. Purchase Order |
| 2. Purchase Invoice via Get Receipt Lines |
INTRODUCTION
A construction company wishes to capture the cost of material with every receipt and load it on project as usage. This is done for big projects which have high inventory & Project Manager wishes to capture project expense with every material receipt. This function is optional & is kept at company level. The functionality is used to capture interim cost for material receipt only & is not applicable for services (G/L) & resources.
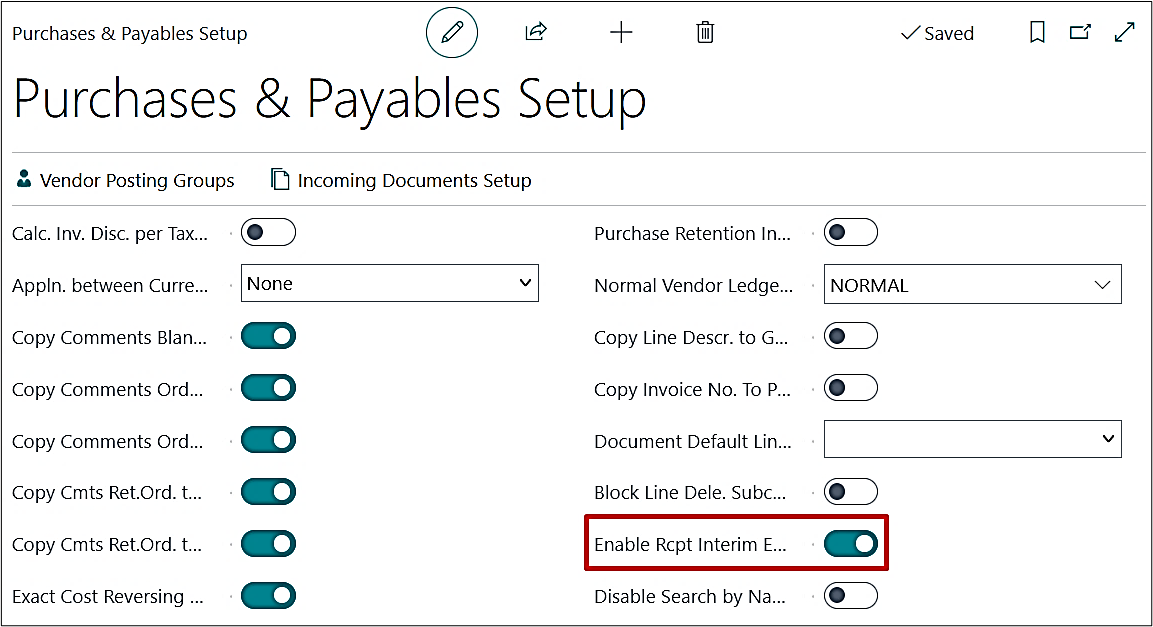
On the Purchases & Payables Setup, turn on the “Enable Rcpt. Interim Entries in JLE” from the General fast tab. This feature is optional & if made true, system will start creating “Interim Entry” in “Project Ledger Entry” with each Purchase Receipt posted against an Item.
Note: This setup of “Interim Entries” is only applicable for Item & shall not work for “Resource” or “G/L”.
PROCESS
1. Purchase Order
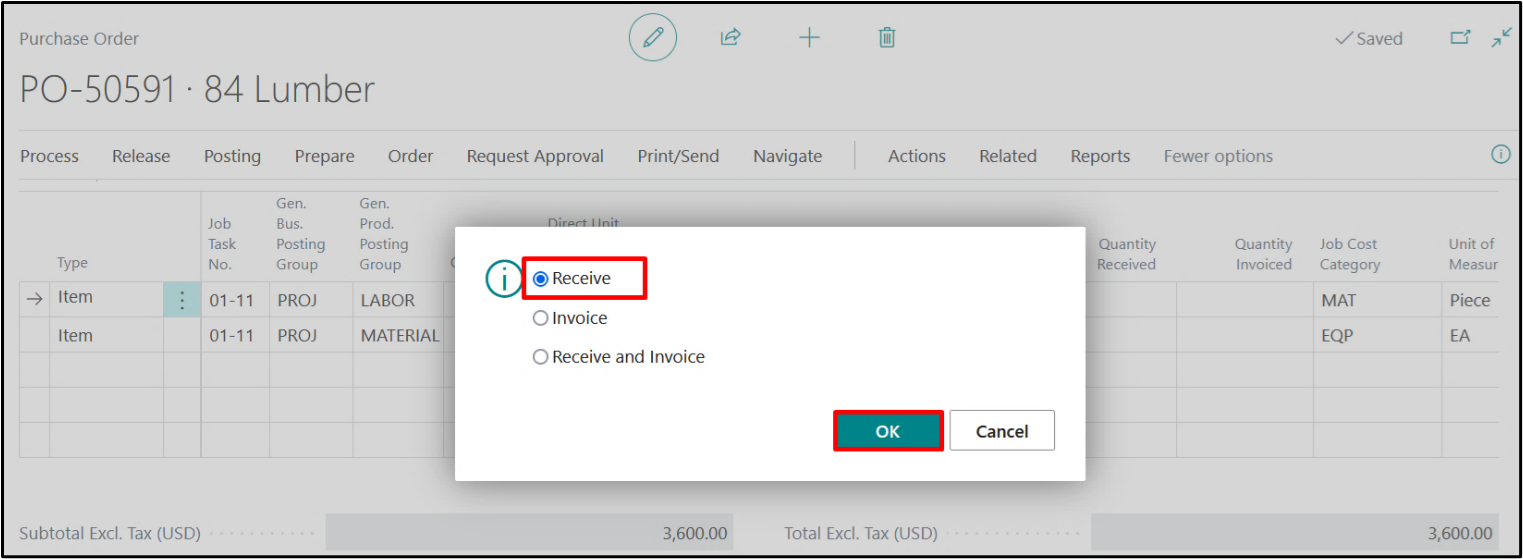
Create a Purchase Order for a project using the normal process as you use, update the quantities to be received and post the order with Receive option.
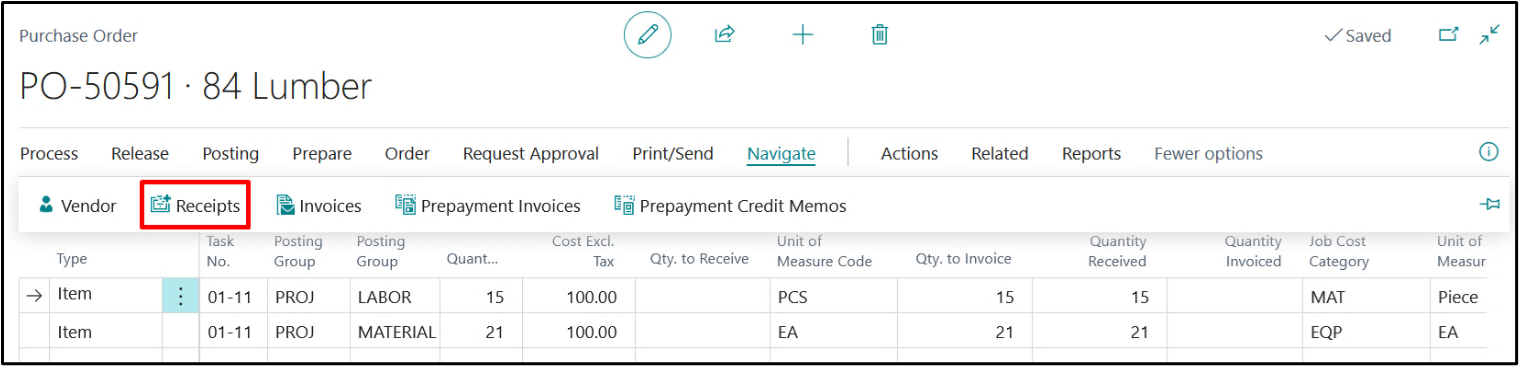
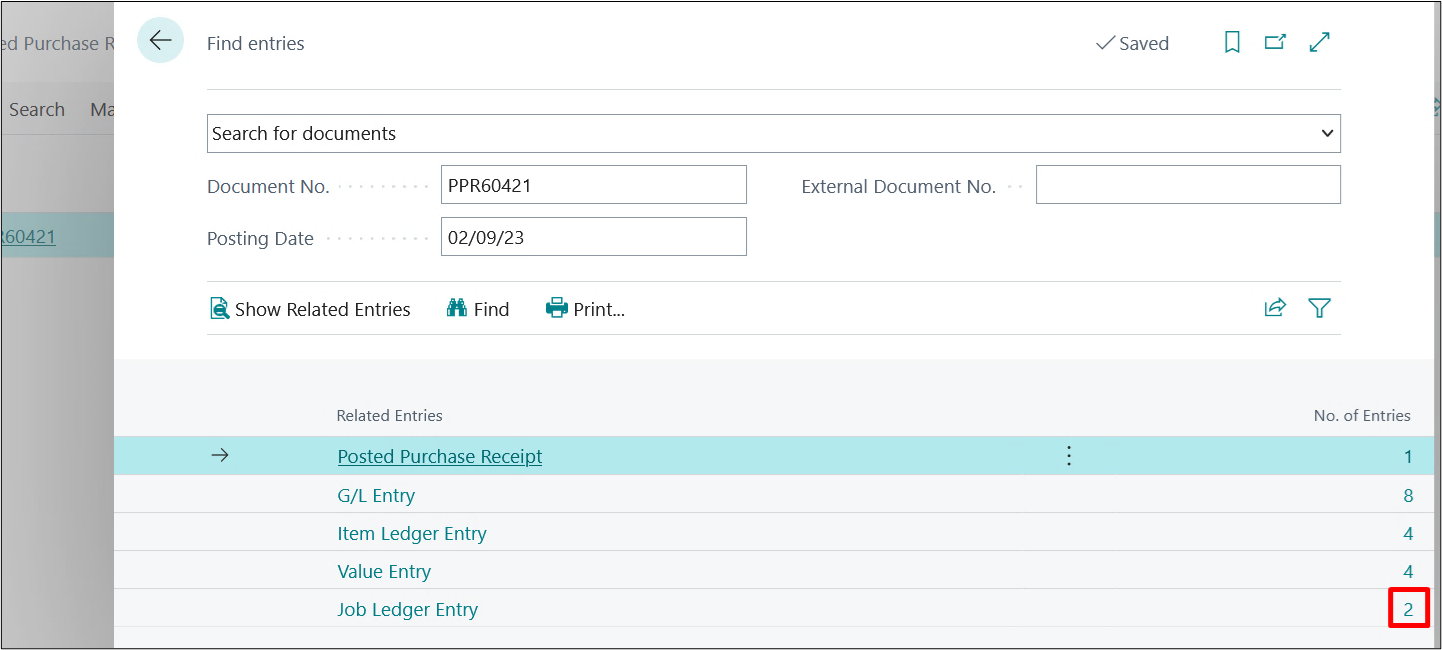
Navigate through the posted receipts by clicking on Order → Receipts → Find Entries

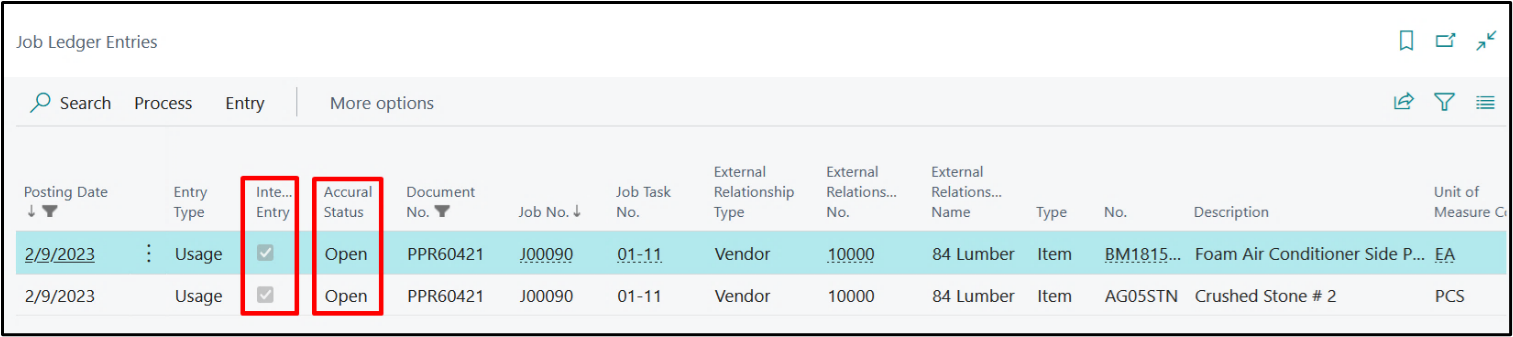
Project Ledger entries shall be created for the number of lines with Item.
When we drill Down these Project Ledger entries then entries can be reviewed with the “Interim Entry” check mark as “True” and the “Accrual Status” as “Open”.
2. Purchase Invoice via Get Receipt Lines
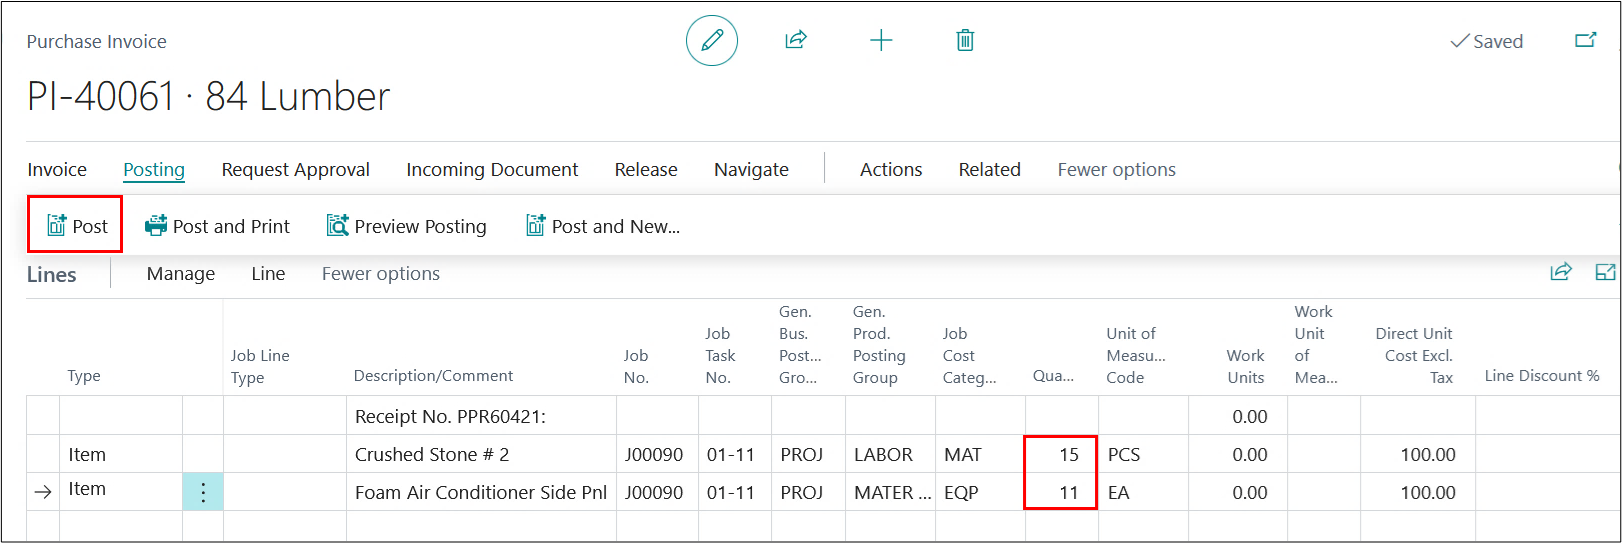
Create a Purchase Invoice with the same details as that of the Purchase Order’s header. Update the Lines using Get Receipt Lines function.
Here, both options are being used as posting the first line with full receipt quantity and second as the partial receipt quantity.
For full receipt quantity, the system will behave as standard with reversal of interim line marking line status equal to close.
One the lines are updated, post the invoice by clicking on Posting → Post.
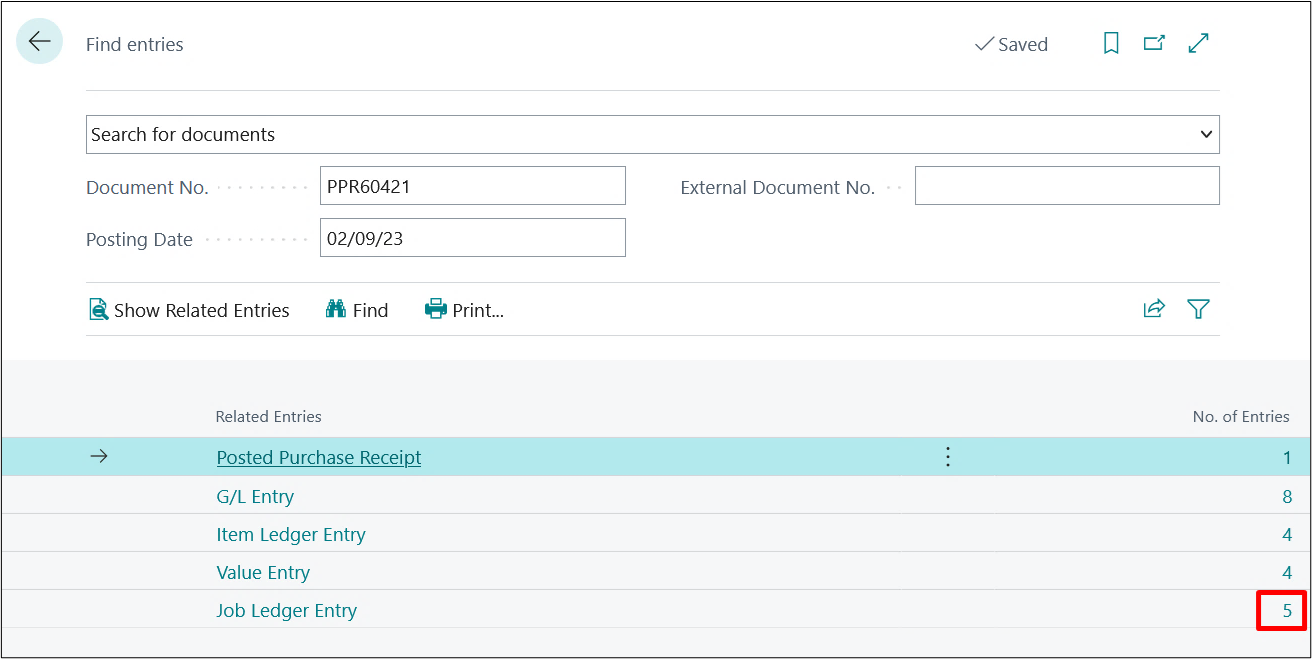
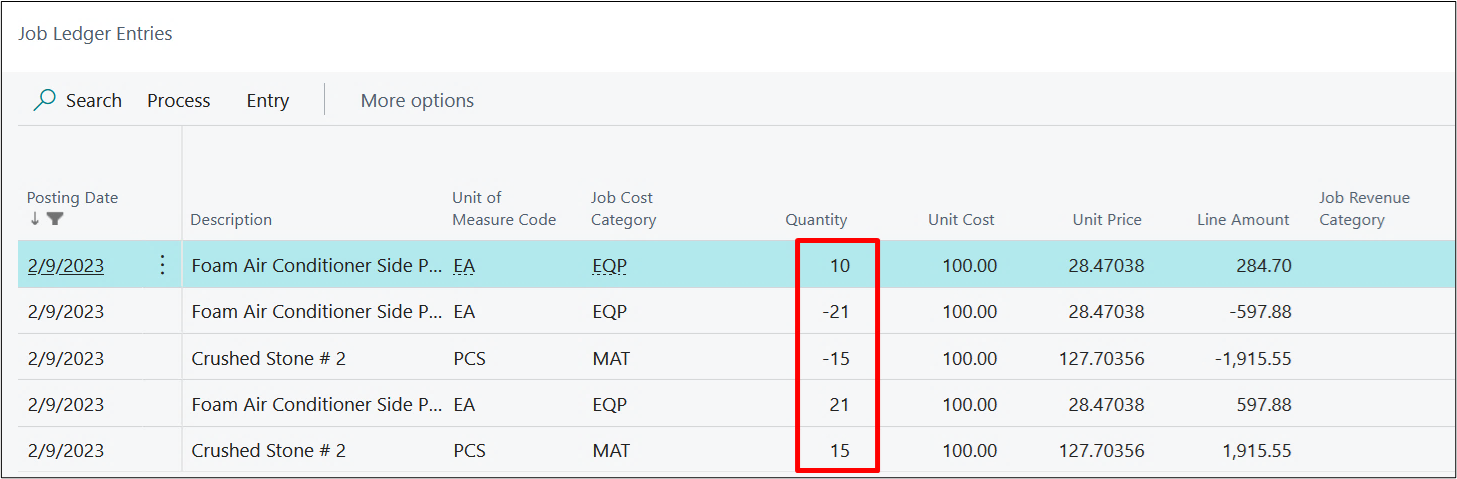
Once the Invoice gets Posted go back to the Posted Purchase Receipt and navigate that to see that Project Ledger Entries are now available with 5 entries where each Interim entry is reversed with complete quantity replacing with standard Project Ledger Entry created upon posting the invoice. The last interim entry for partial quantity is created with status Open, which will be used for upcoming Purchase Invoice against same PO.
On drilling down the Project Ledger Entries, we find that the status of the knocked off entries is changed to Closed and one Open Interim Entry is created as we invoiced the receipt partially in one case.
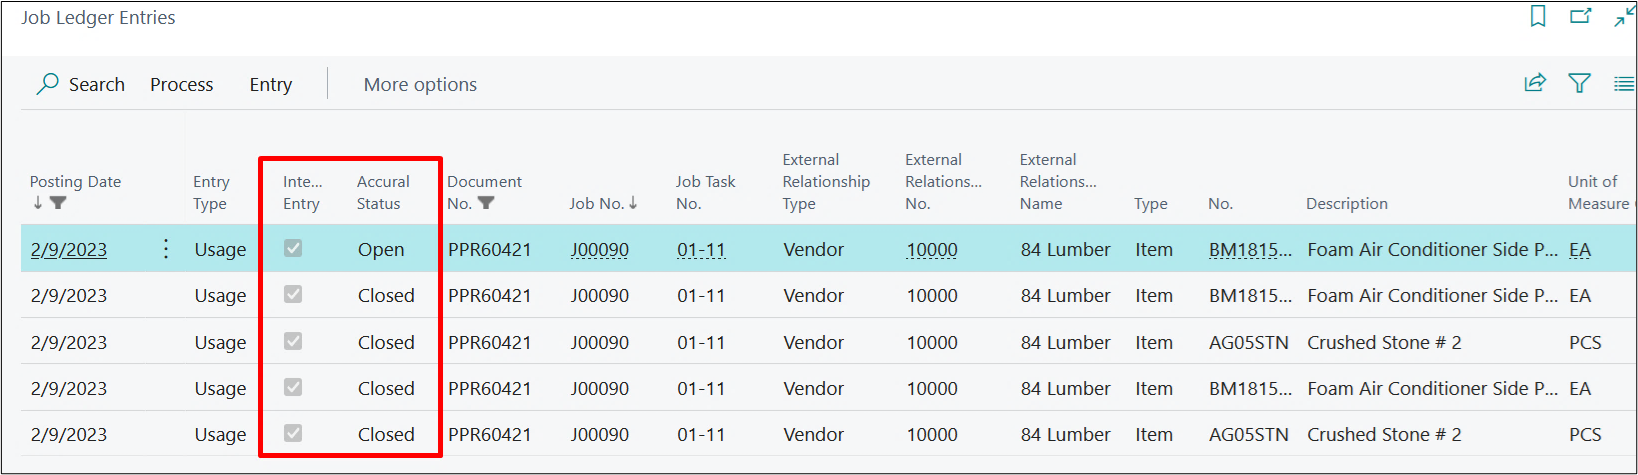
On comparing the Quantity, you can see that 4 entries have been entirely knocked off and one additional Interim Entry of remaining quantity had been created with Quantity 10.
Please note that the Undo Receipt functionality will run the same as before with additional Interim Project Ledger Entries for both positive and negative quantities.