Ch 10 – Time and Material
Contents
TIME AND MATERIAL
Time and Material (T&M) are a contract in which the project owner agrees to pay the contractor based upon the time spent by the contractor’s employees and subcontractors to perform the work, and for materials used in the construction (plus the contractor’s mark up on costs incurred), no matter how much work is required to complete construction. Time and Material is generally used in projects in which it is not possible to accurately estimate the size of the project, or when it is expected that the project requirements would most likely change.
1. Defining the Project
Setting up a T&M project is like setting up a fixed price project in ProjectPro. Many of the fields are the same, however, there are some fields that differ.
When you have a T&M project, a few fields you will need to focus on are:
- Contract Date – Always populate the contract date of the Project.
- Contract Type – Choose the contract type as “Time and Material” for a T&M project.
- Gen. Business Posting Group – Define the general business posting group to which the postings should be directed to for a particular project. This is particularly important for purchase Type of “G/L Account” to pass along the “Revenue Account” from the Gen. Business Posting Group
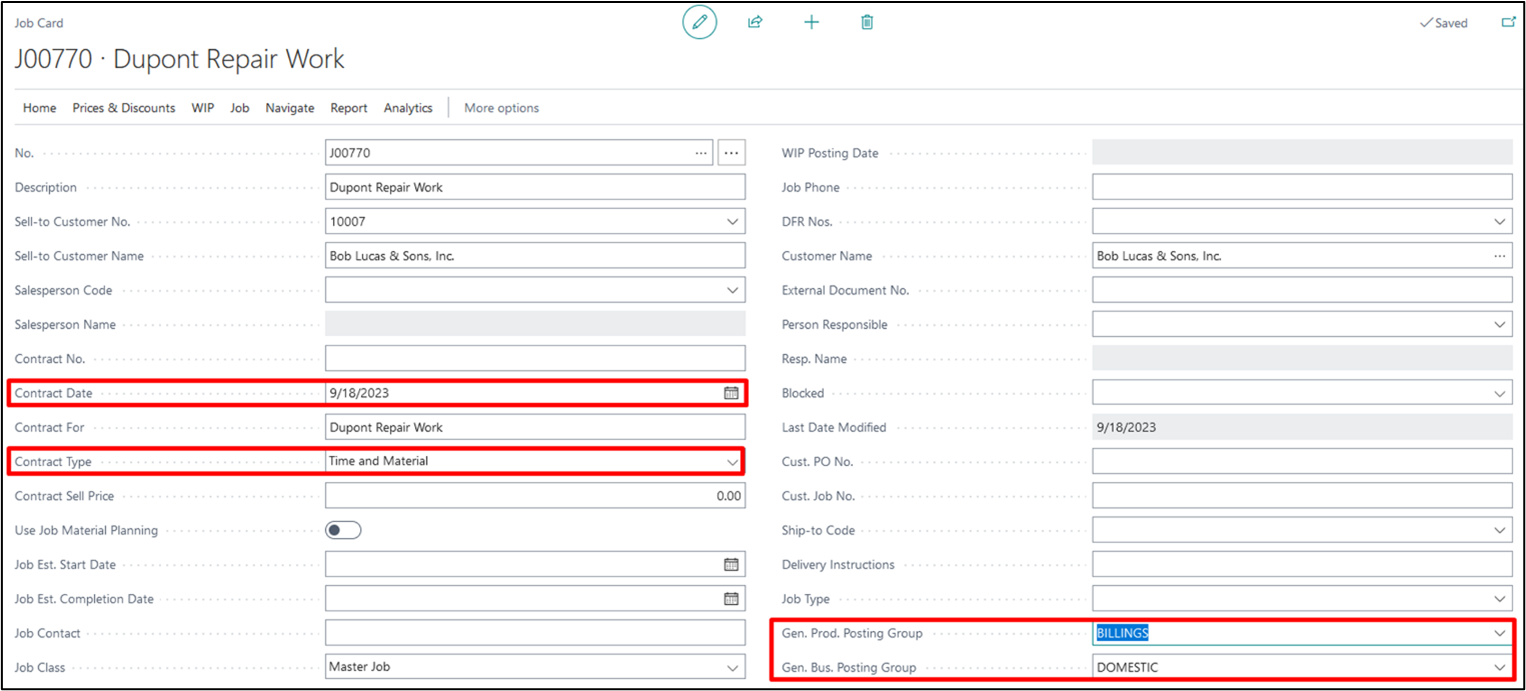
Continue filling in the rest of the Project Info section as you normally would for any project.
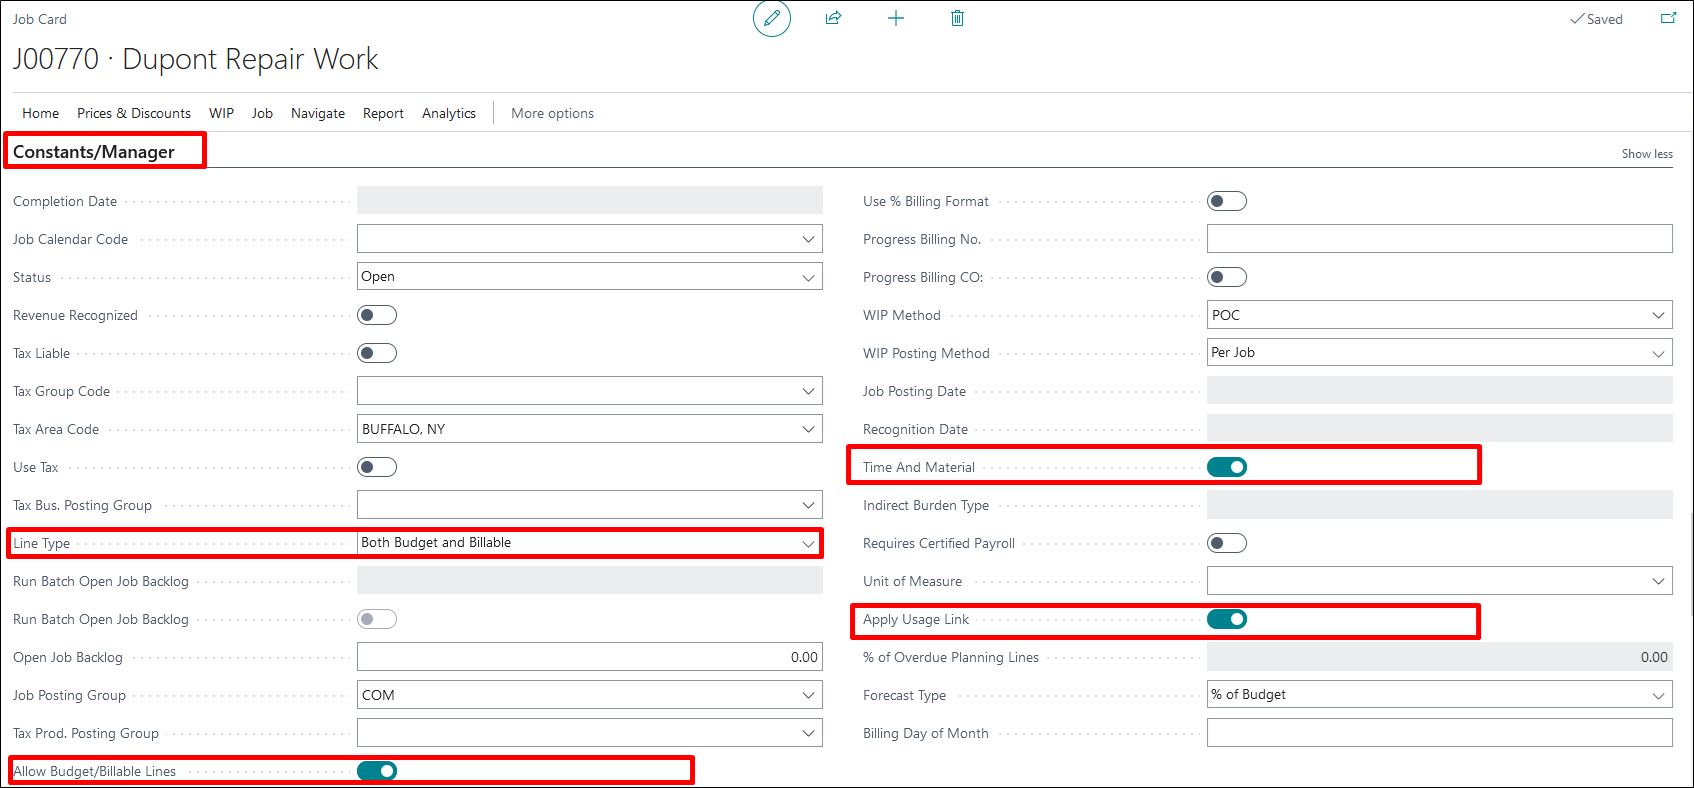
Next, under the Constants/Manager fast tab of the project card.
- Status – Status of the project should be set to Open.
- Time and Material – Time and material option should be toggled “ON”.
Once you select “Time and Material”, ProjectPro will automatically turn on “Allow Budget/Billable Lines” “Apply Usage link” and set the Line Type to “Both Budget and Billable”. This will create the “Project Planning Lines” for both the Budgets and Billable with the “Budgeted Costs” matching each “Actual Project Cost” entry. And the “Billable” values will be created as well for future project sales invoicing.
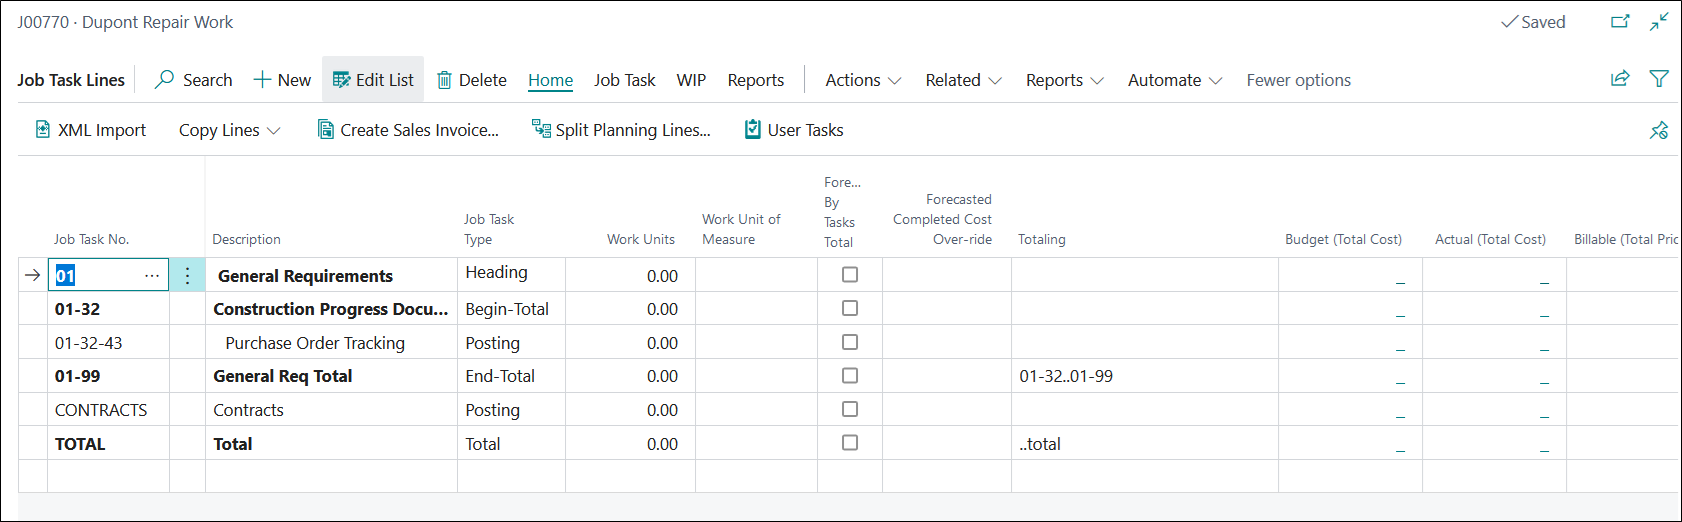
2. Defining the Project Task Lines
Once you have completed the Project Card setup, make sure to add the Project Task Lines that will be used on this project. If you have assigned default Project Tasks, you will see they have automatically populated with the new Project Card creation.

3. Defining Prices
To define the markup to be used or the fixed cost/price to use when posting transactions, we use the Prices option from the project card ribbon.

Depending on your business process, you may choose to assign a markup based on cost categories, or Resources/Items. If using special labor rates, then select “Resources” and add “Resource Group” with rates per hour.
Note: Usually a company will use “Resource” for Labor and use “Cost Category” markup % for Materials, Subcontractors, Equipment and Others.
a) Project Cost Category Prices
To use markups by Cost Categories, select the Cost Category option from the Prices & Discounts section.
From here, you will select each of the cost categories you will be utilizing on the project and assign the appropriate markup for each. As an example, below, there are several different categories with markups assigned for each.
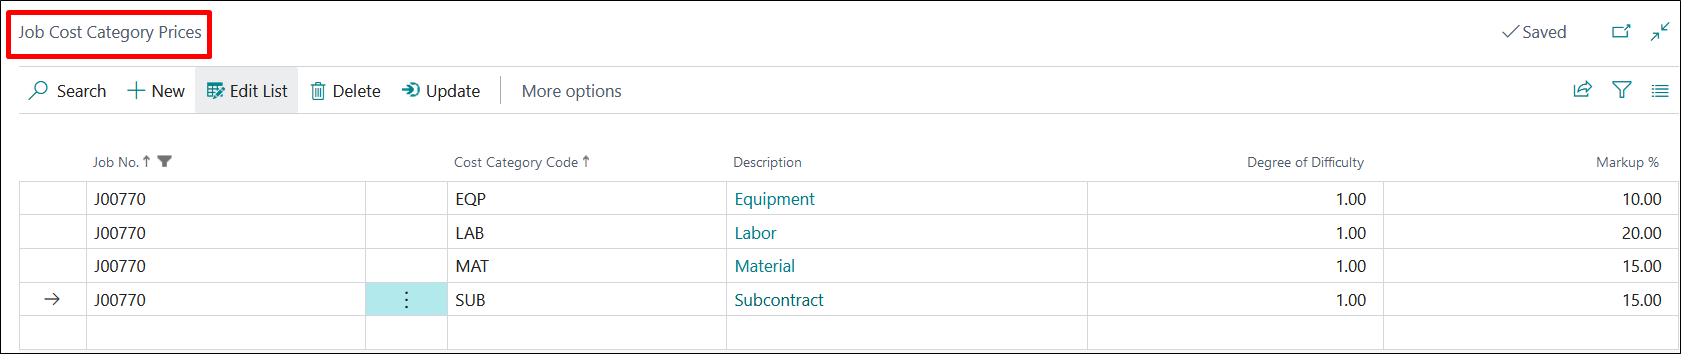
Once completed, any cost postings to those cost categories will automatically result in a billable line reflecting the corresponding markup.
If you are using the Resources/Items option, you will set each up separately.
b) Project Resource Cost/Prices
To set up your resources, select the Resources option from the Prices & Discounts section. Since it is uncommon to know the exact resources of who will be working on the project at the time of set up, it is a good practice to set up your resource cost and markup using Resource Groups.
Note: You will need to ensure each of your resources are assigned to a resource group on the resource card.
On this screen you will set up the following:
- Project Task No. – Only fill this in if your entries are task no. specific. Otherwise, not necessary.
- Skill Class Code – If applicable
- Code – This is the Resource Group that you are defining.
- Unit of Measure Code – Select the appropriate UOM.
- Work Type Code – Specify if you are charging different rates based on different employee shifts.
- Unit Cost – Enter the cost to be charged for this resource group.
- Markup% – Enter the Markup you are charging for this resource group.
- Unit Price – This will be automatically updated after your cost and mark-up are entered.
- Cost Type – Specifies the cost type as Fixed or % Extra or LCY Extra.
- Line Discount % – Define the line discount percentage, if any.
- Description – This is automatically entered based on your Code.
If you use resource Type “ALL”, also populate the “Work Type Code”. Employees belonging to this Work Type Code will use employee default Cost.
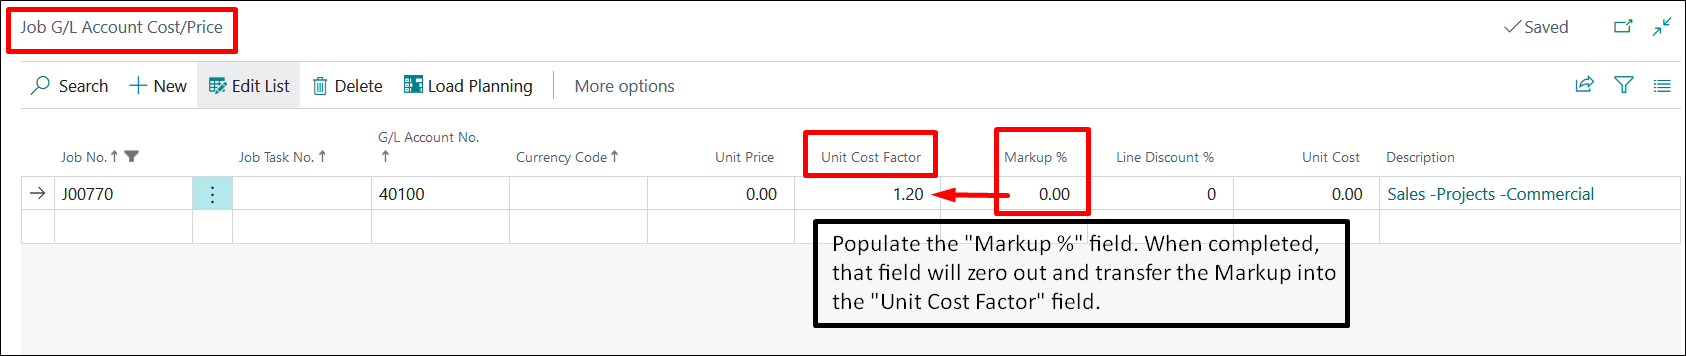
c) Project G/L Account Cost/Prices
To set up Cost/Price for G/L Accounts, enter Project Task No., G/L Account/s and the Markup %. In the below example, G/L Account 4020 (Cost of Materials) has a 20% Markup, which when entered it the field got zeroed out and transferred to “Unit Cost Factor” field.
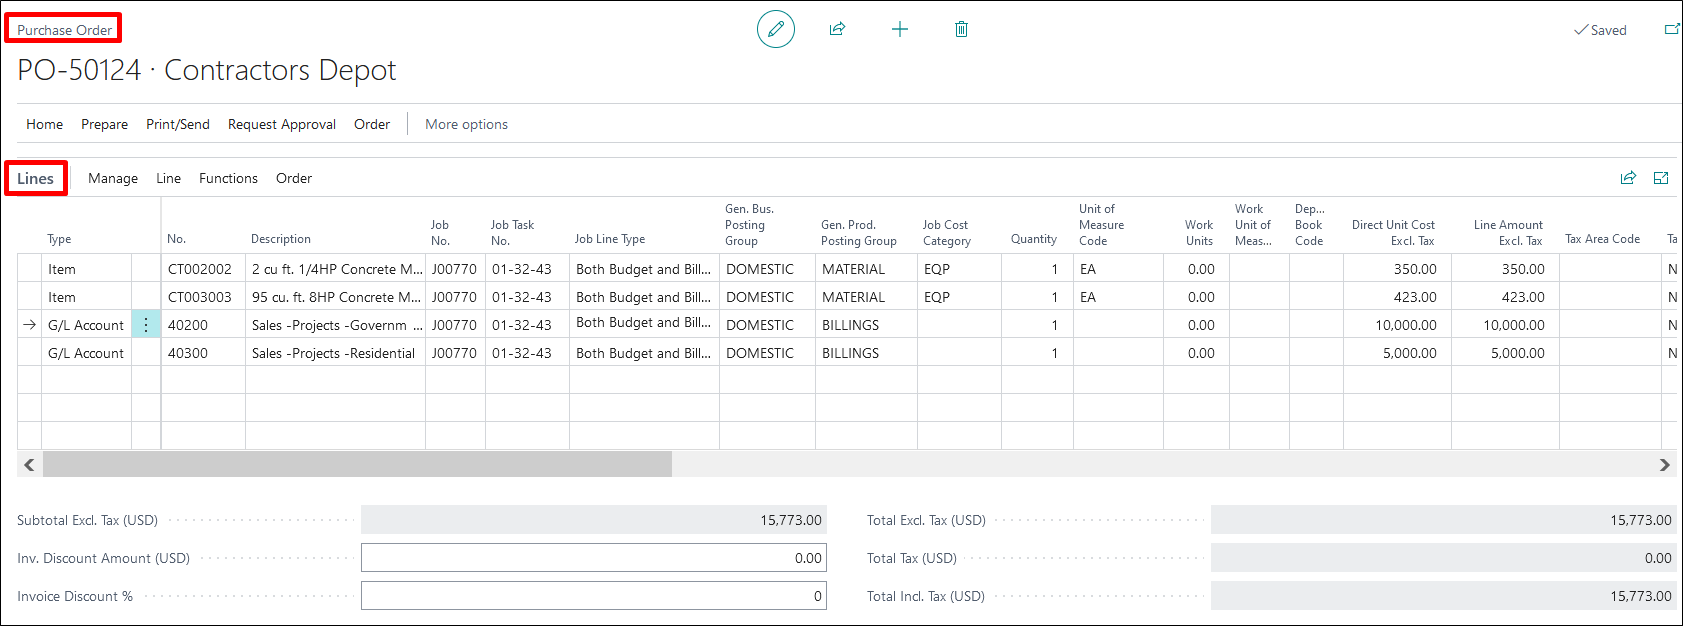
4. Creating Purchase Order
The next step is to create a Purchase Order using G/L and Project Cost Category and Post. Make sure you have the Project Price fields showing in the Purchase Order Lines. This reflects the Markups that have been set in the Cost/Price Tables.
Note: Because this is a Time and Material Project, the Line Type will automatically be “Both Budget and Billable”.
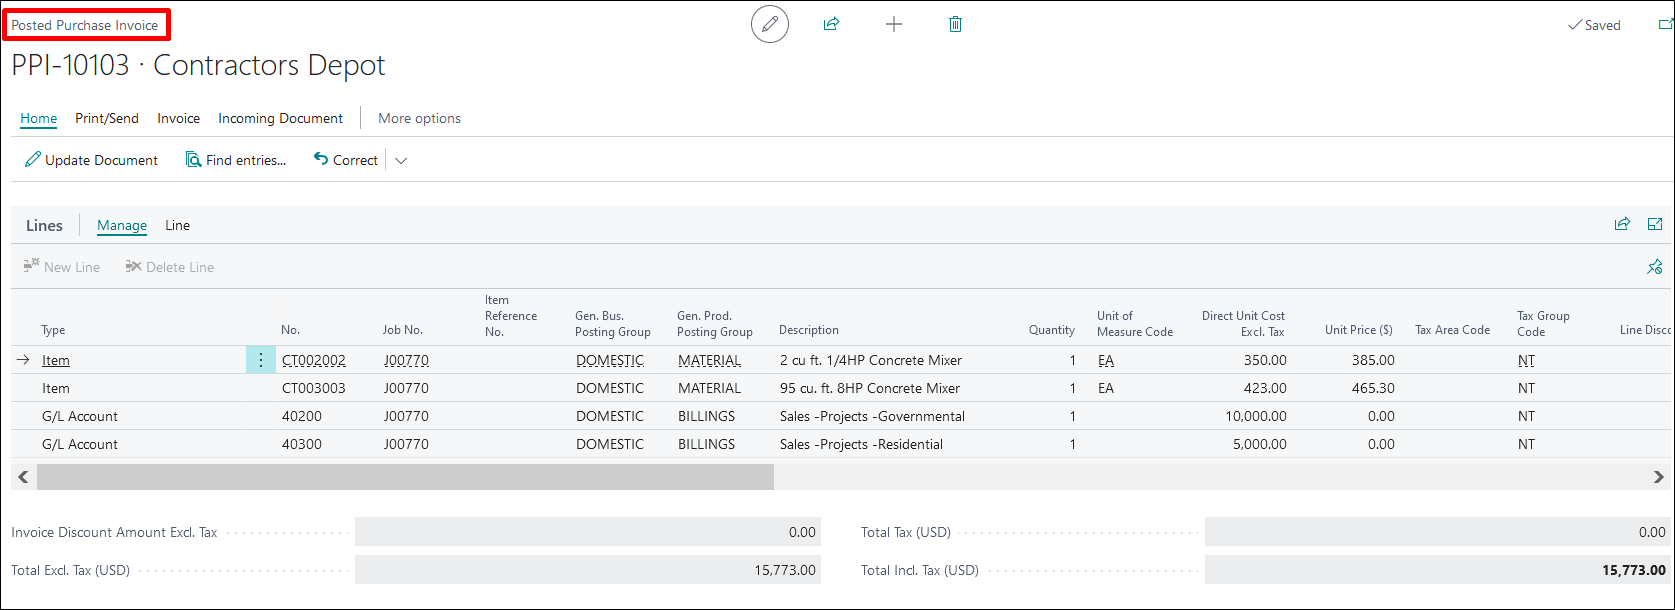
After posting the Purchase Order, review the Planning Lines. The Budget and Billable lines have been split to reflect the Costs and Prices of your Purchase Order.
5. Posting Labor to Project Journal
a) Manual Entries
For T&M project, the project journal entries must be created with Line Type selected as “Both Budget and Billable”, as below.
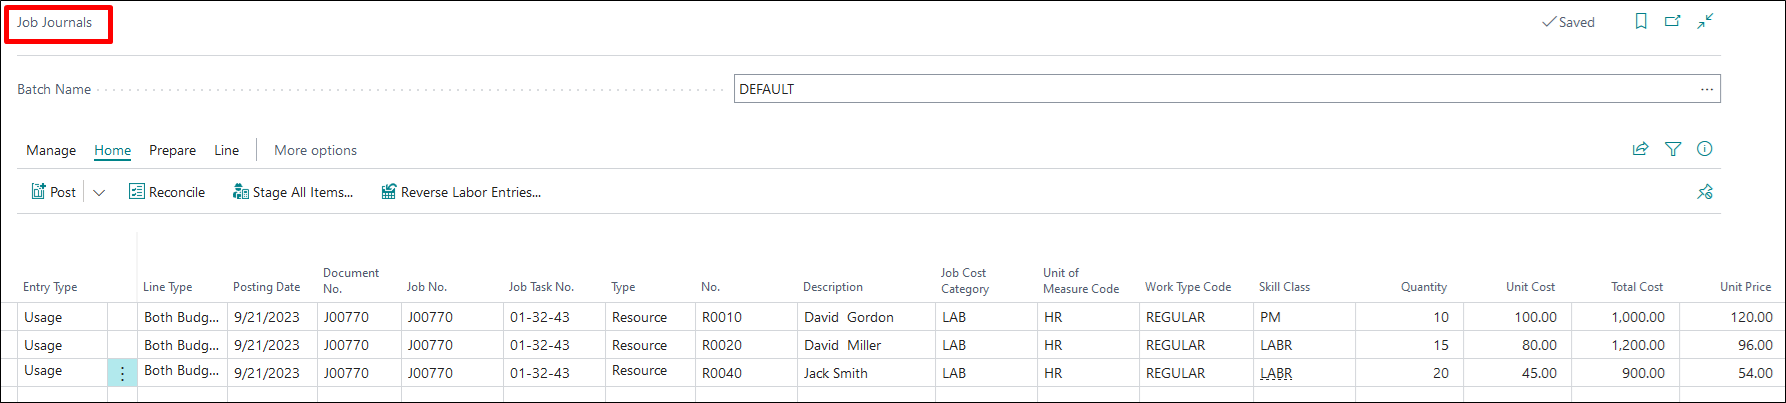
Once the journal is posted, the entries are updated as the Project Planning Lines on the Project, see below.

b) Time Sheet Entries
You can also post the labor hours and rates through time sheet functionality:
- Create Multiple Project based time sheets.
- Submit the time sheet.
- Approval authority can approve the time sheets.
- From project journal suggest the time sheets for the given period and project.
- Post the Project Journal and revisit the Project planning lines to check the impact.

- Click on the Create Time Sheets button from ribbon, to create the time sheet and fill in the relevant details required for filling in the timesheet.
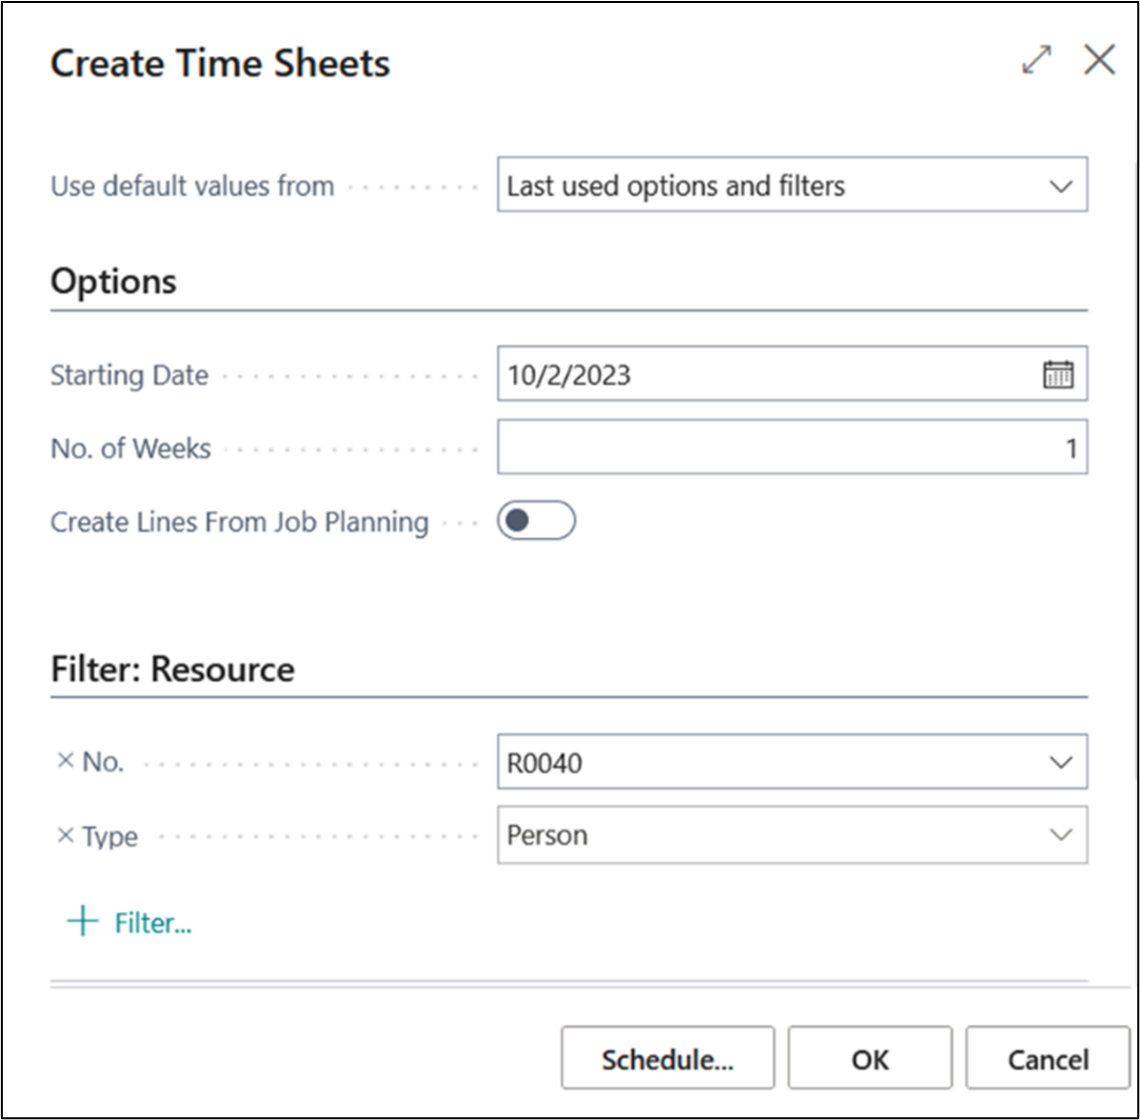
- Select the Starting Date, No. of Weeks and then select the Resource No. filter and the Type of the Resource to generate the time sheet.
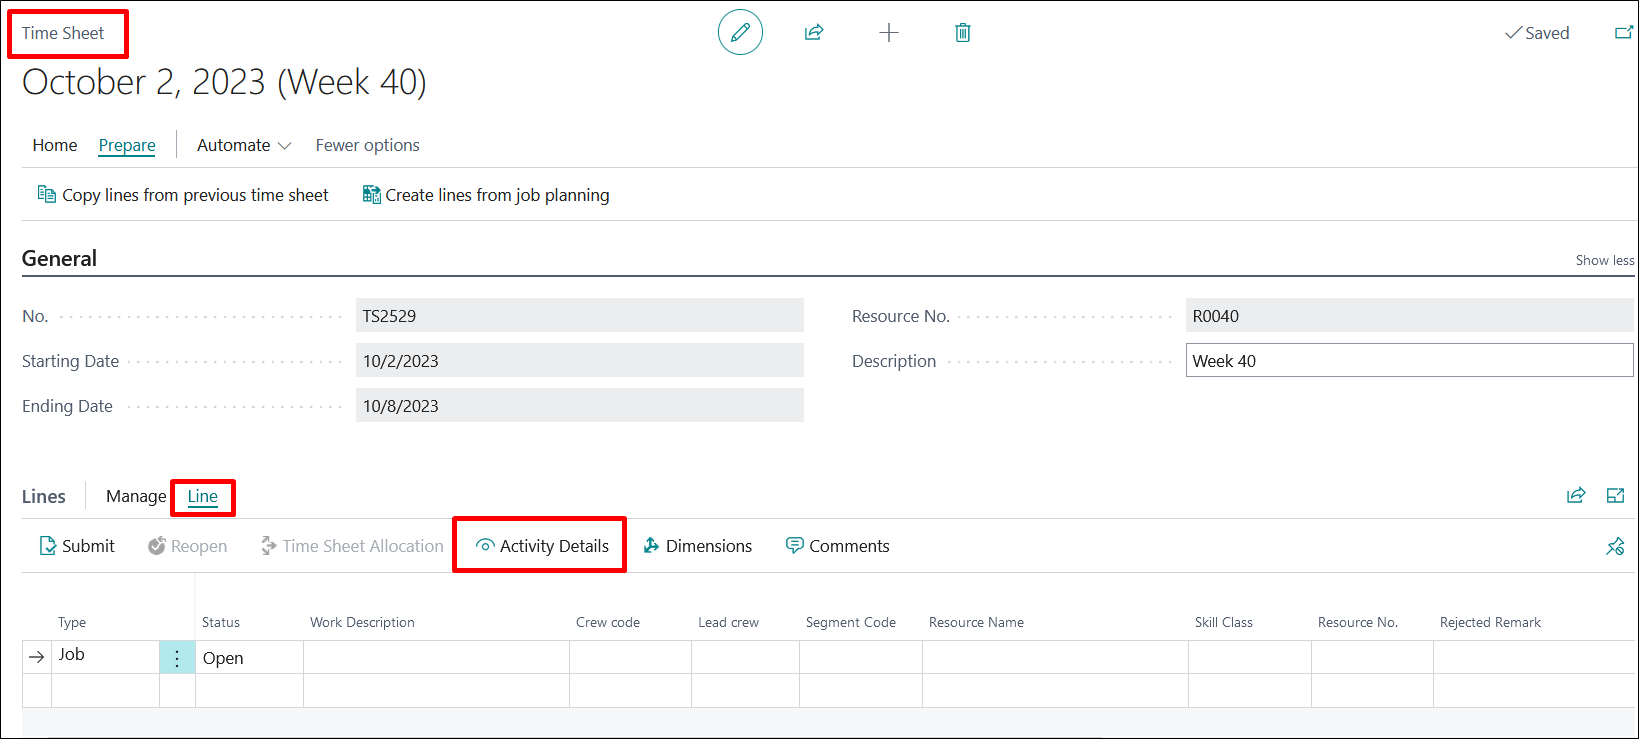
- Select the Type as Project, and then click on Activity Details to enter any required information.
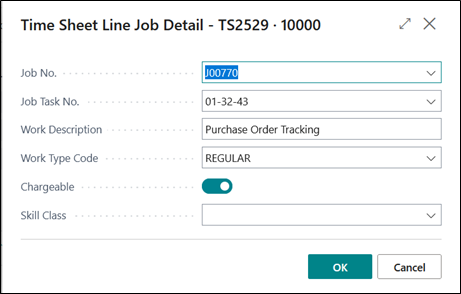
- Select Project No, Project Task No, Description and Work Type Code.
- Select the Skill Class for time sheet entry.
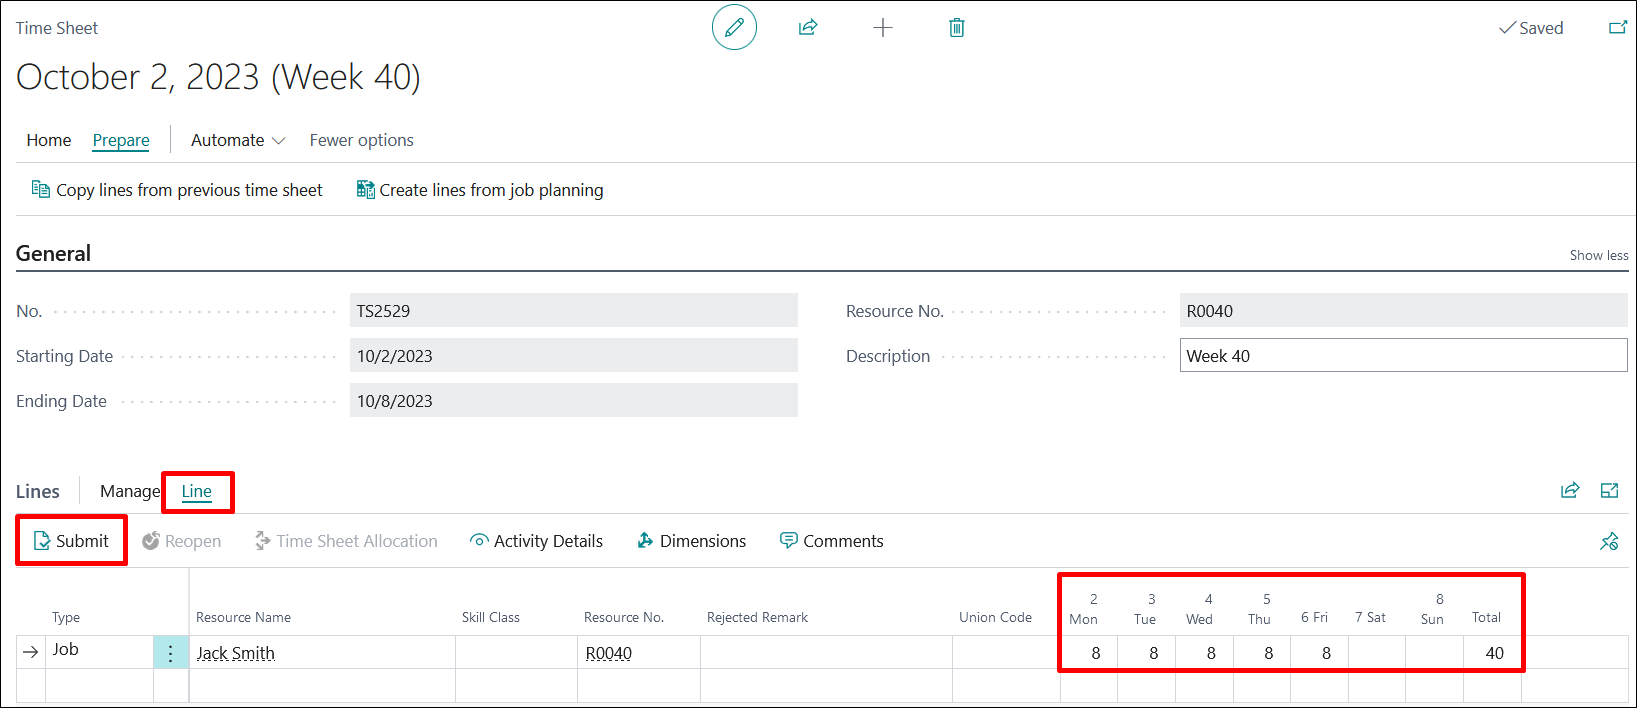
- Enter respective hours that you want to log in for respective days for a respective resource.
- Click on Process Submit, to submit your timesheet.
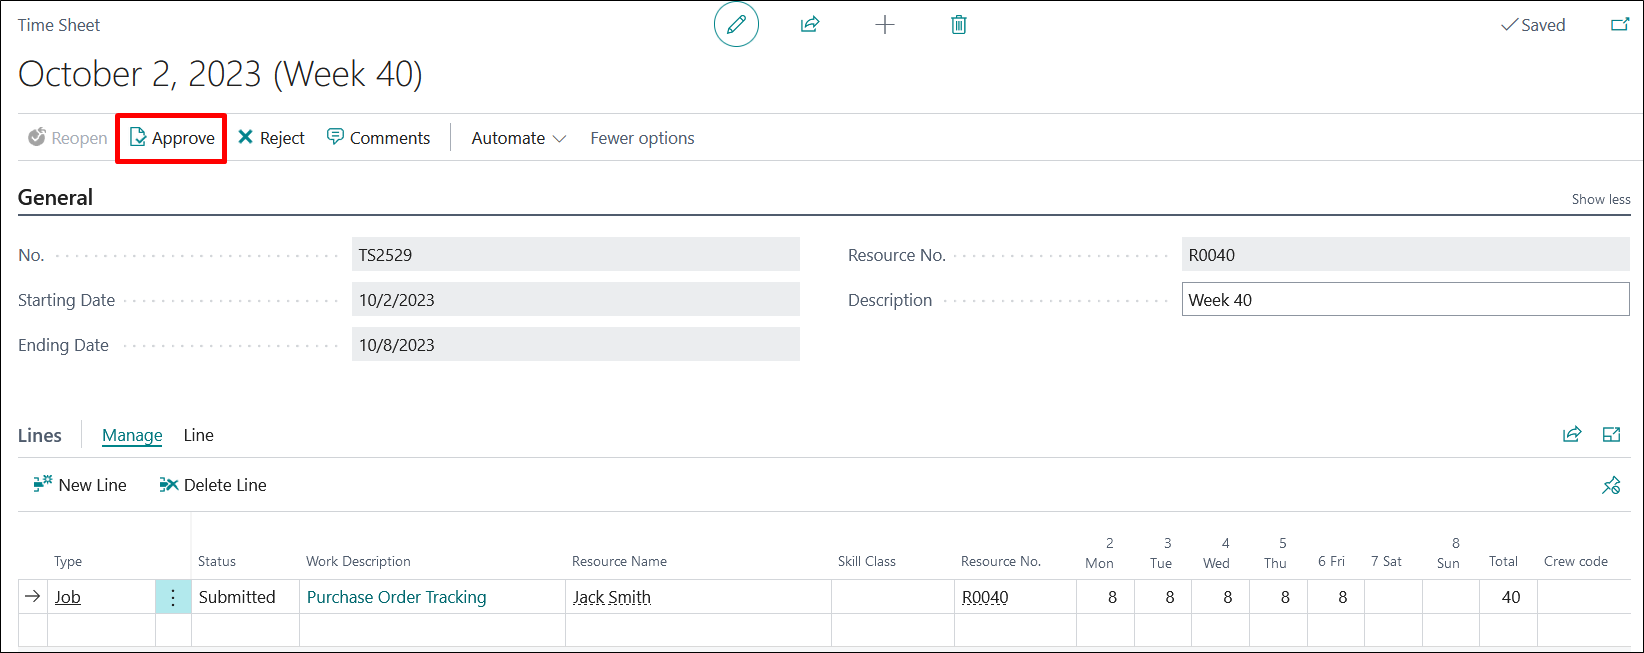
- Search for “Manager Time Sheets” using search option, to approve the time sheets submitted by the resource. The approval manager can be defined on the resource card.

- Click on Edit Time Sheet option from ribbon and edit the time sheet that are pending for approval from Manager Time Sheet. Once the time sheet has been entered, manager can either Approve/Reject/Reopen the time sheet.
- All approved time sheets can be suggested while in the project journal for final posting of a project. Search for Project journal or can select the same from Role Center.

- On Project Journals, click on Actions Functions Suggest Lines from Time Sheets. Using this option, pull in all the approved time sheets to project journal lines.
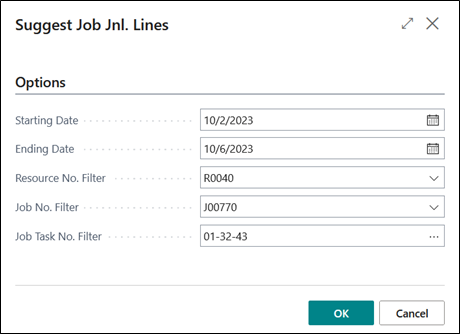
- Click on OK to populate lines on Project Journal. Check all the journal lines and Post from Post/Print section from the ribbon.
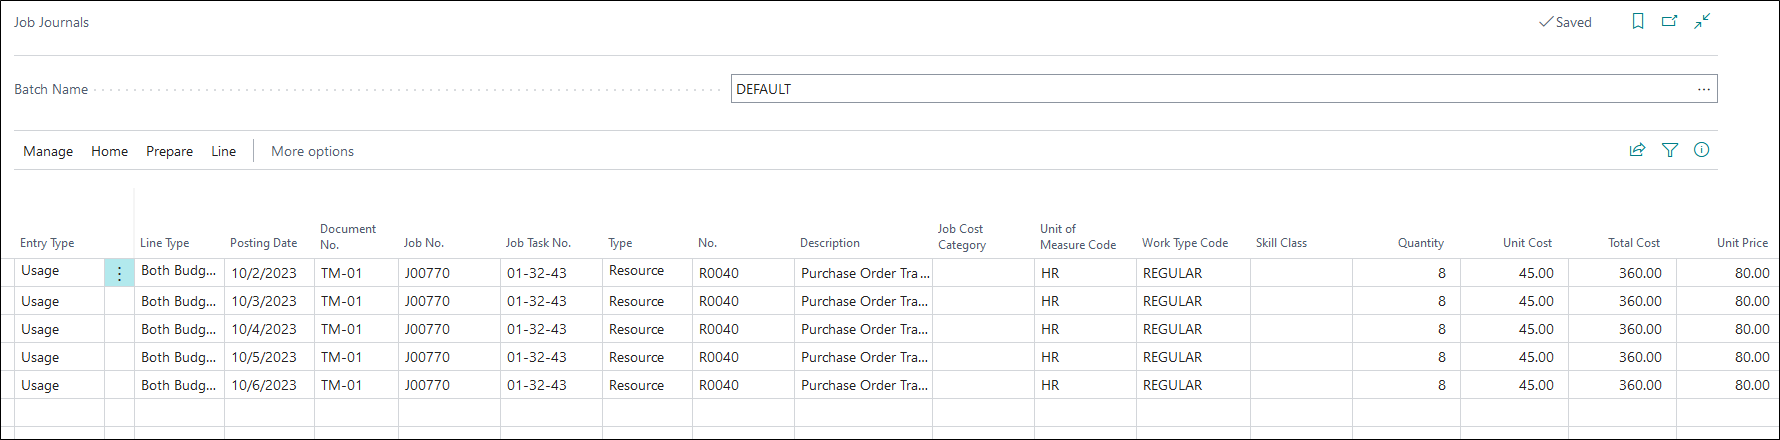
- Once the Project Journal is posted, check the impact on the related project’s Project Planning Lines.

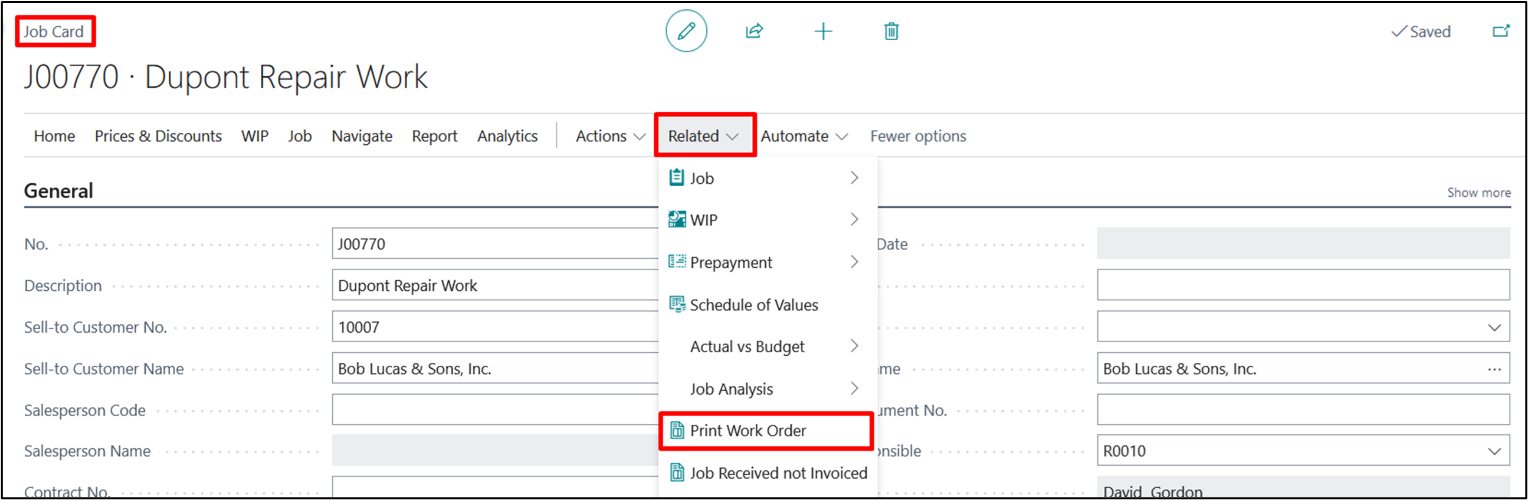
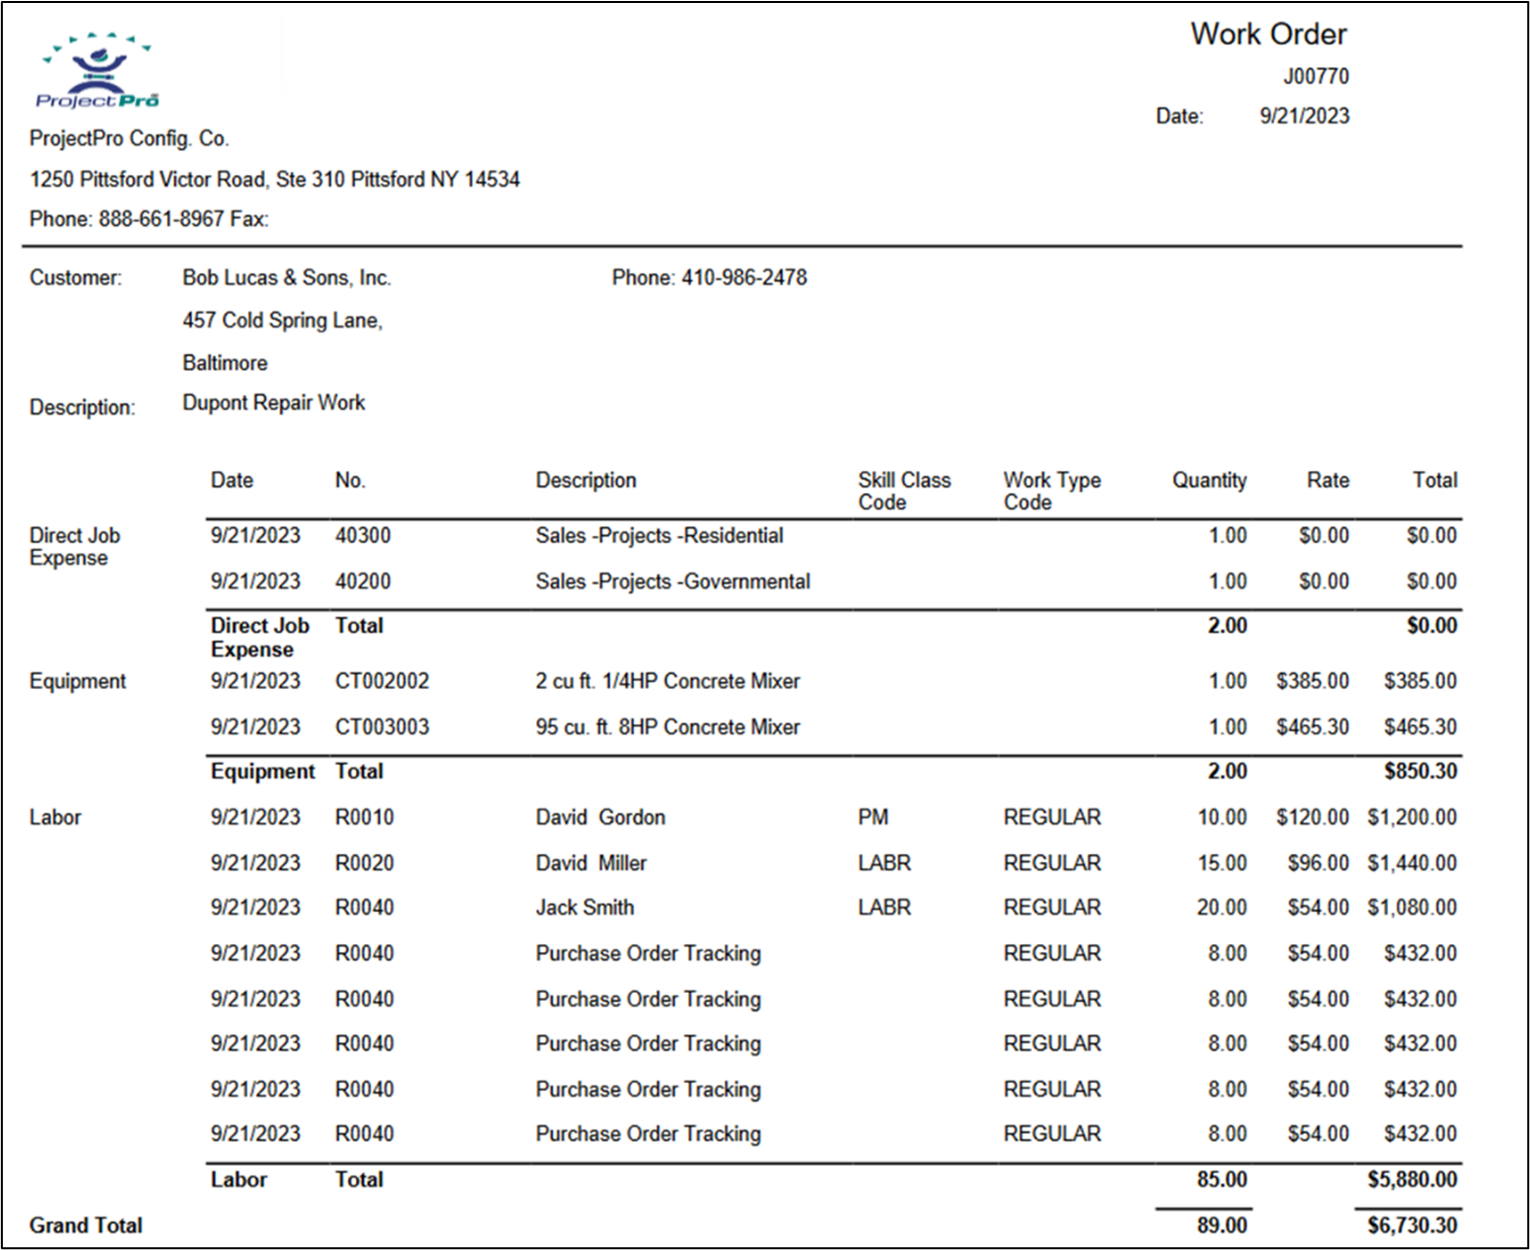
Work Order Report
The main report for T&M project process is the Work Order report, which can be printed from the project card as below.
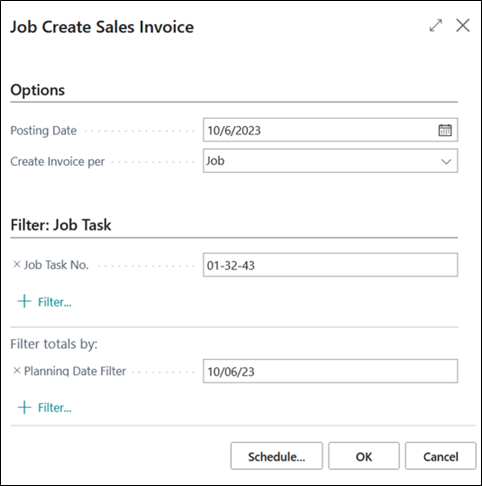
6. Creating Sales Invoice
Create Sales Invoice from Projects List Page. To review, edit and post, Go to Sales Invoice List Page.

Note: Always enter Project No. when creating Sales Invoice from the Projects List page, else it will create Sales Invoices for all of your projects.

7. Additional Time & Material Project Methods
When setting up a T&M Project that has an established “Cost Budget”, the Project Planning Lines will be “Budget” only while the Line Type on the Project card will be set to “Billable” to create only the Billable project planning lines for future Project Sales Invoice.